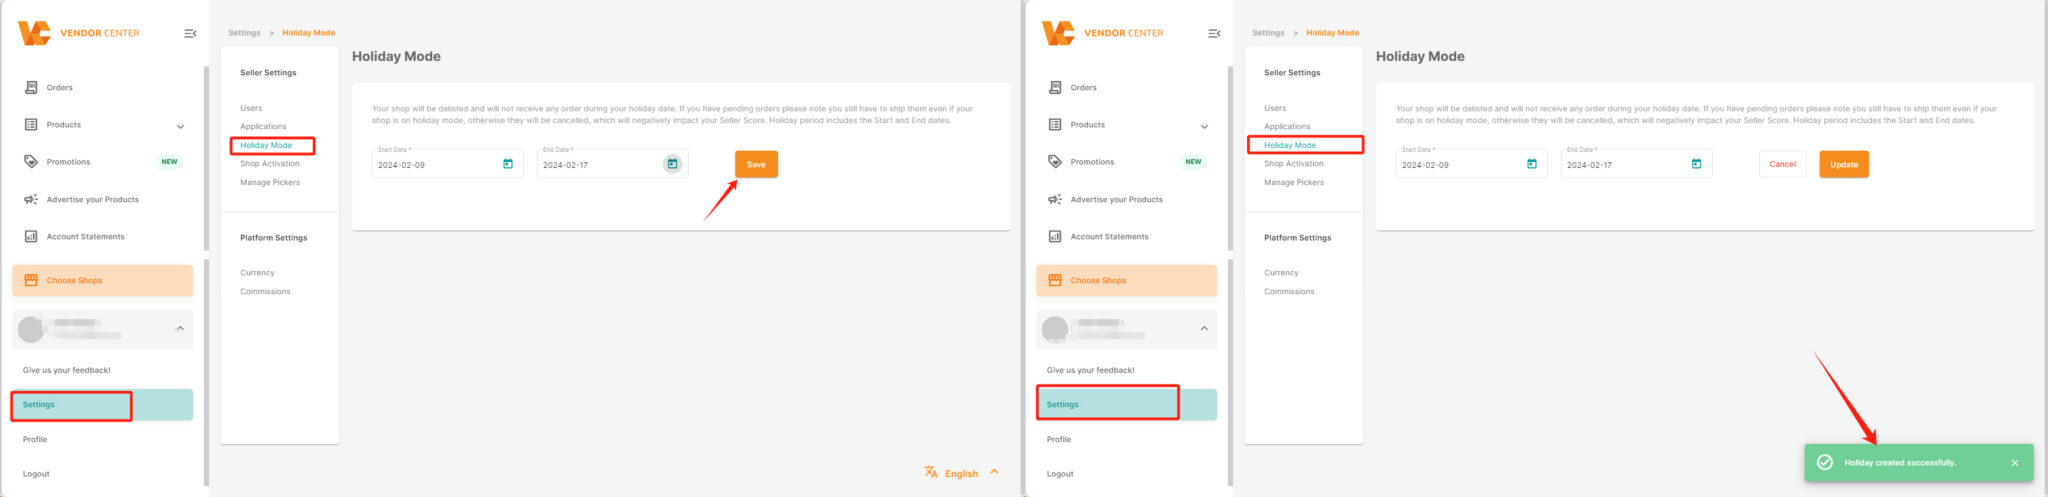
1. Open holiday mode
To set up a custom holiday period, follow these steps :
Vendor Center -> Settings -> Holiday Mode, Customize the start and end dates for the holiday period,and click “Save” to apply the changes.
For example, if your store is going offline from February 9, 2024, to February 17, 2024, it will automatically resume its online status on February 18, 2024.
Upon successful setup, you will see a message in the lower right corner of the page stating, “Holiday created successfully.”
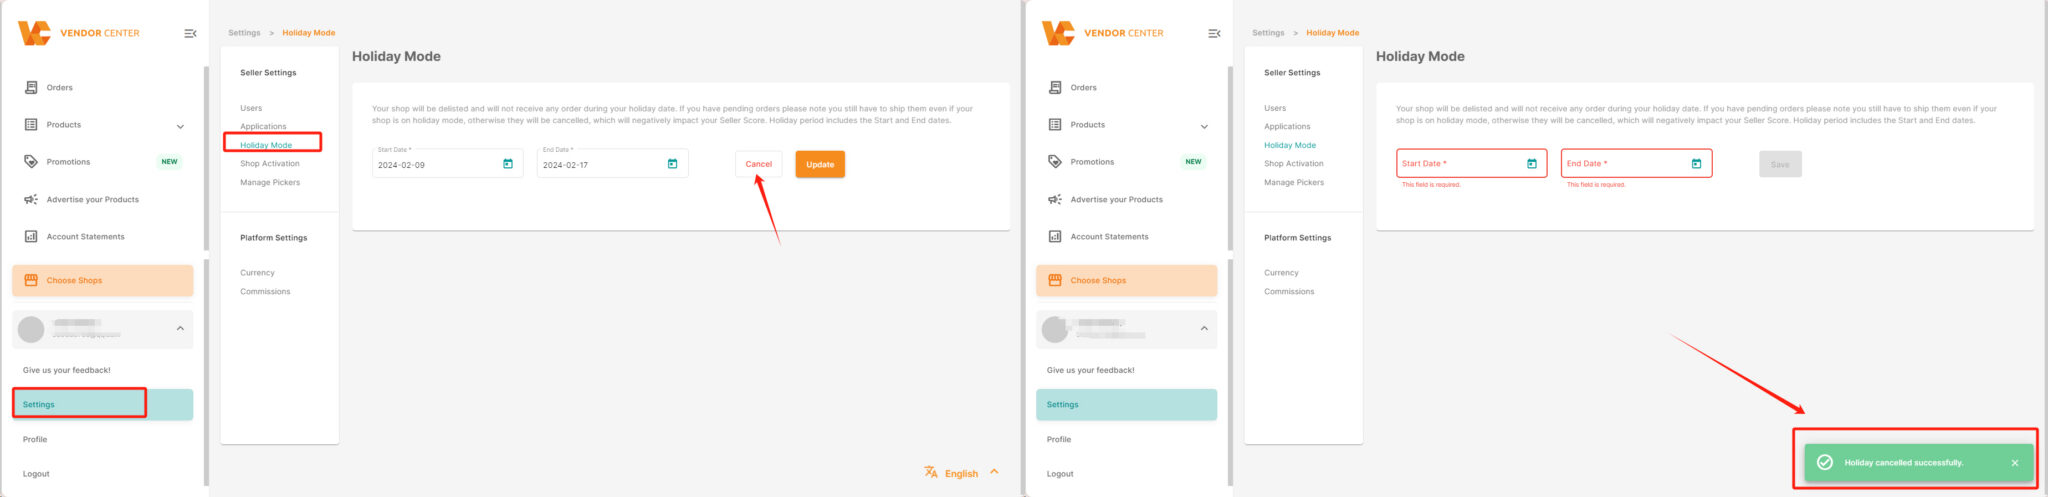
2. Close holiday mode
To deactivate the holiday mode for your store, follow these steps:
Vendor Center -> Settings-> Holiday Mode,and click the “Cancel” button to deactivate the holiday mode.
After successfully cancelling, you will receive a notification in the lower right corner of the page that says, “Holiday Cancelled successfully.”
Once the holiday mode is canceled, your store will be back online within 24 hours.
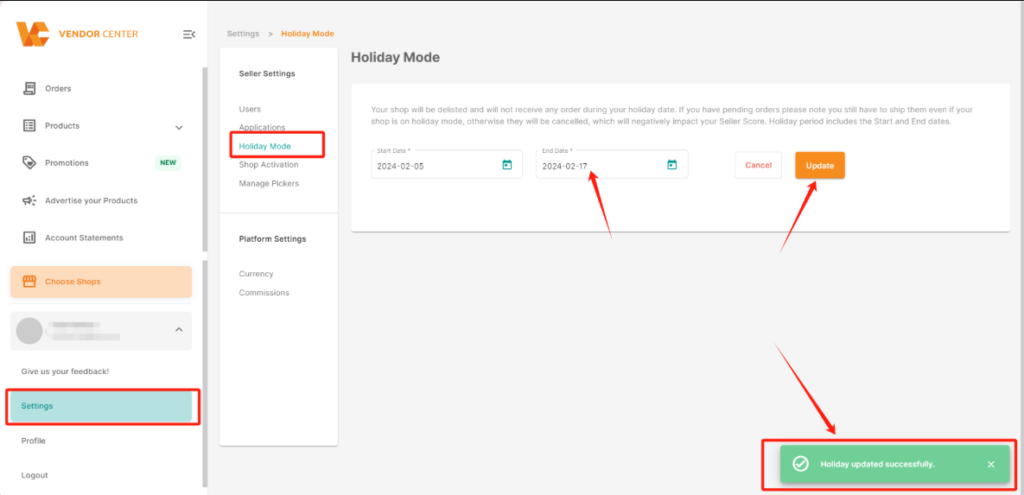
3. Update holiday mode
To modify the holiday mode for your store, follow these steps :
Vendor Center-> Settings -> Holiday Mode,click the “Update” button next to the holiday period you wish to modify.
After successfully updating the holiday settings, a message will appear in the lower right corner of the page stating, “Holiday updated successfully.”
Your store will go offline during the specified time period as per the updated settings.
According to the relevant policies, the activation period for holiday mode should be limited to within 90 days.