1. Product content update in bulk
Here, product content specifically refers to information other than the product price.
Products that have failed quality inspection (QC rejected/QC failed) can be downloaded by filtering products with the Status “Rejected”. After modifying the content according to the prompts and re-uploading, the system will automatically conduct a second quality inspection.
The steps are as follows:
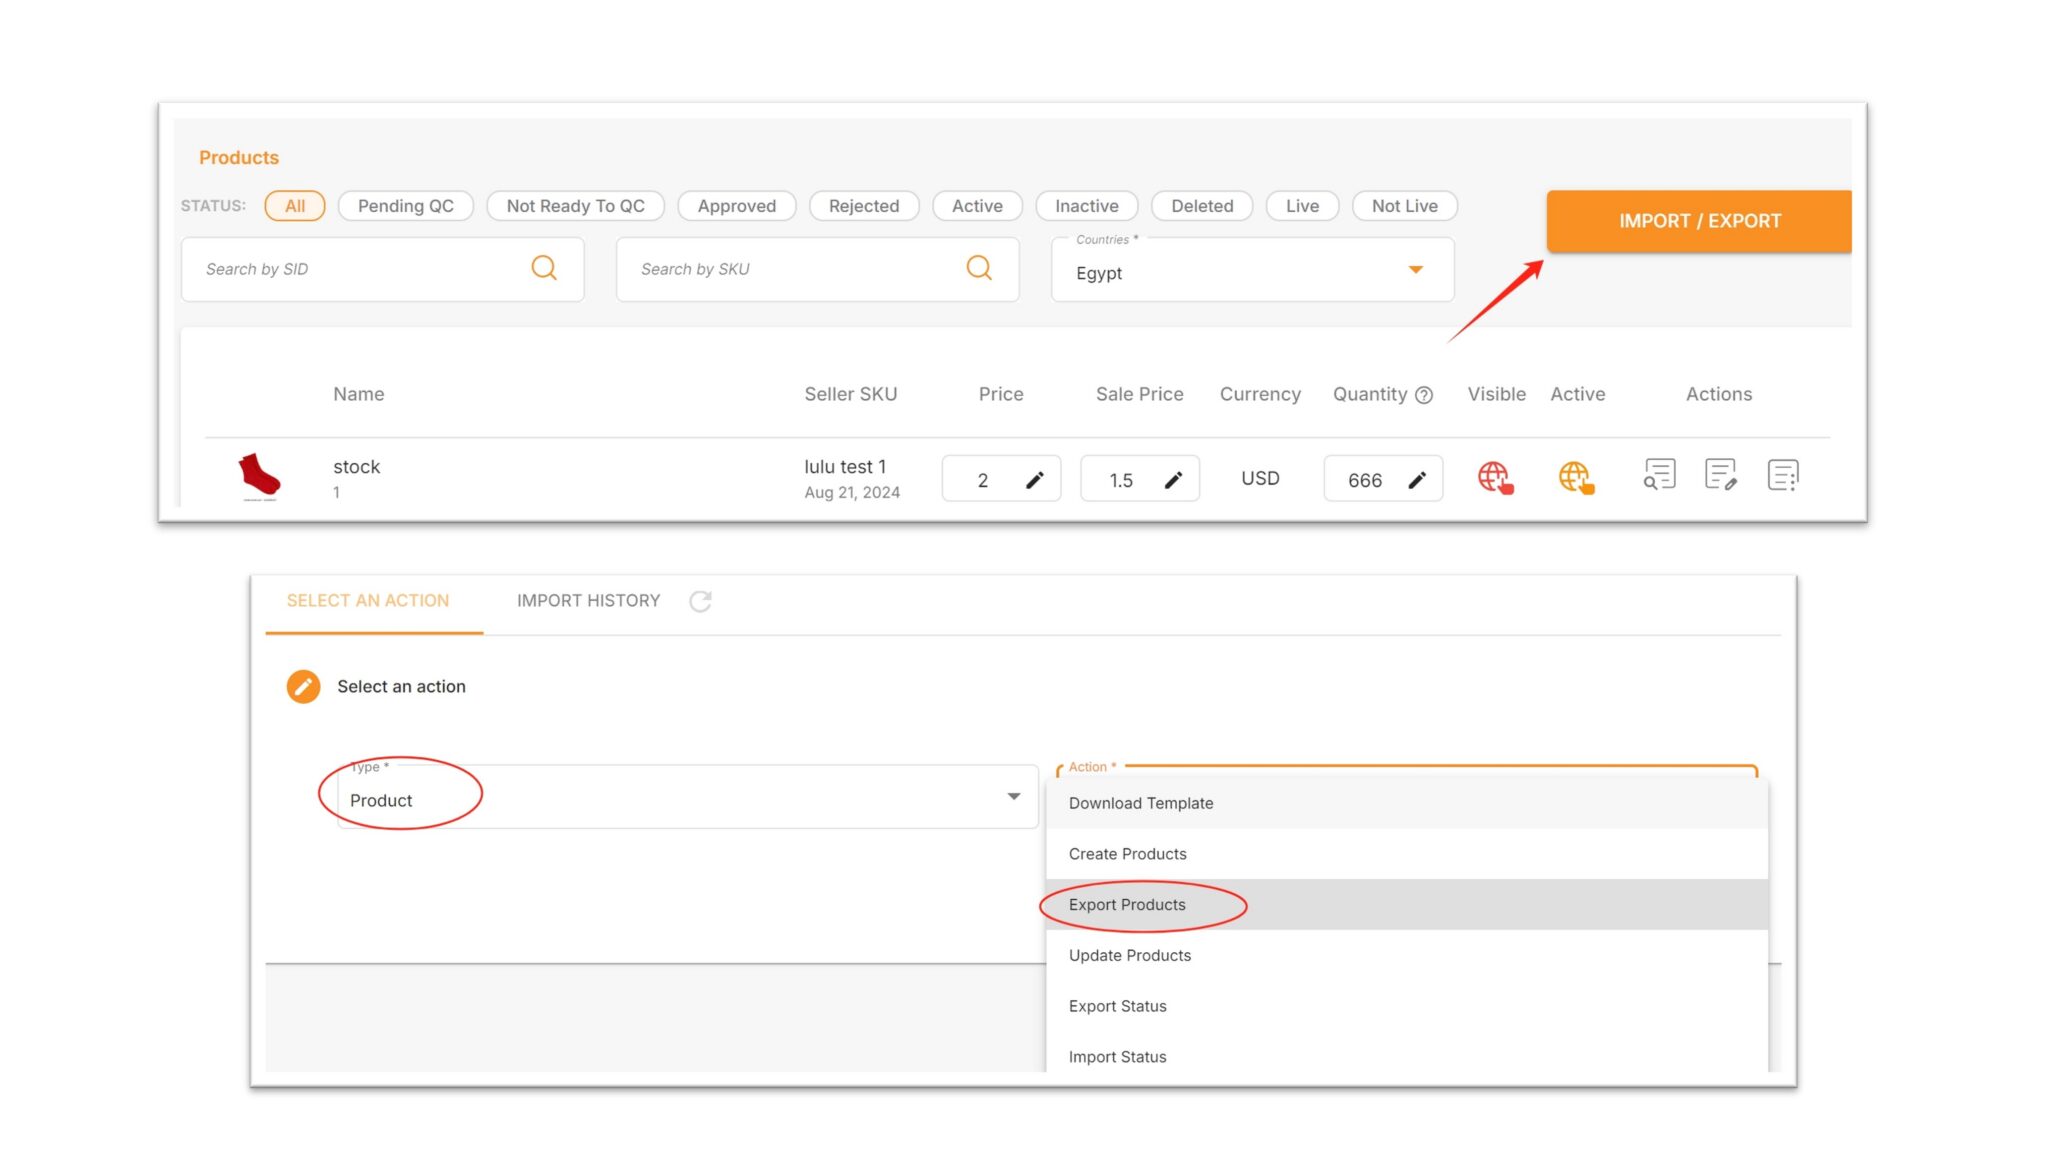
1.1 On the Manage Products page, click “IMPORT / EXPORT”
1.2 Select Product for Type, and select Export Products for Action
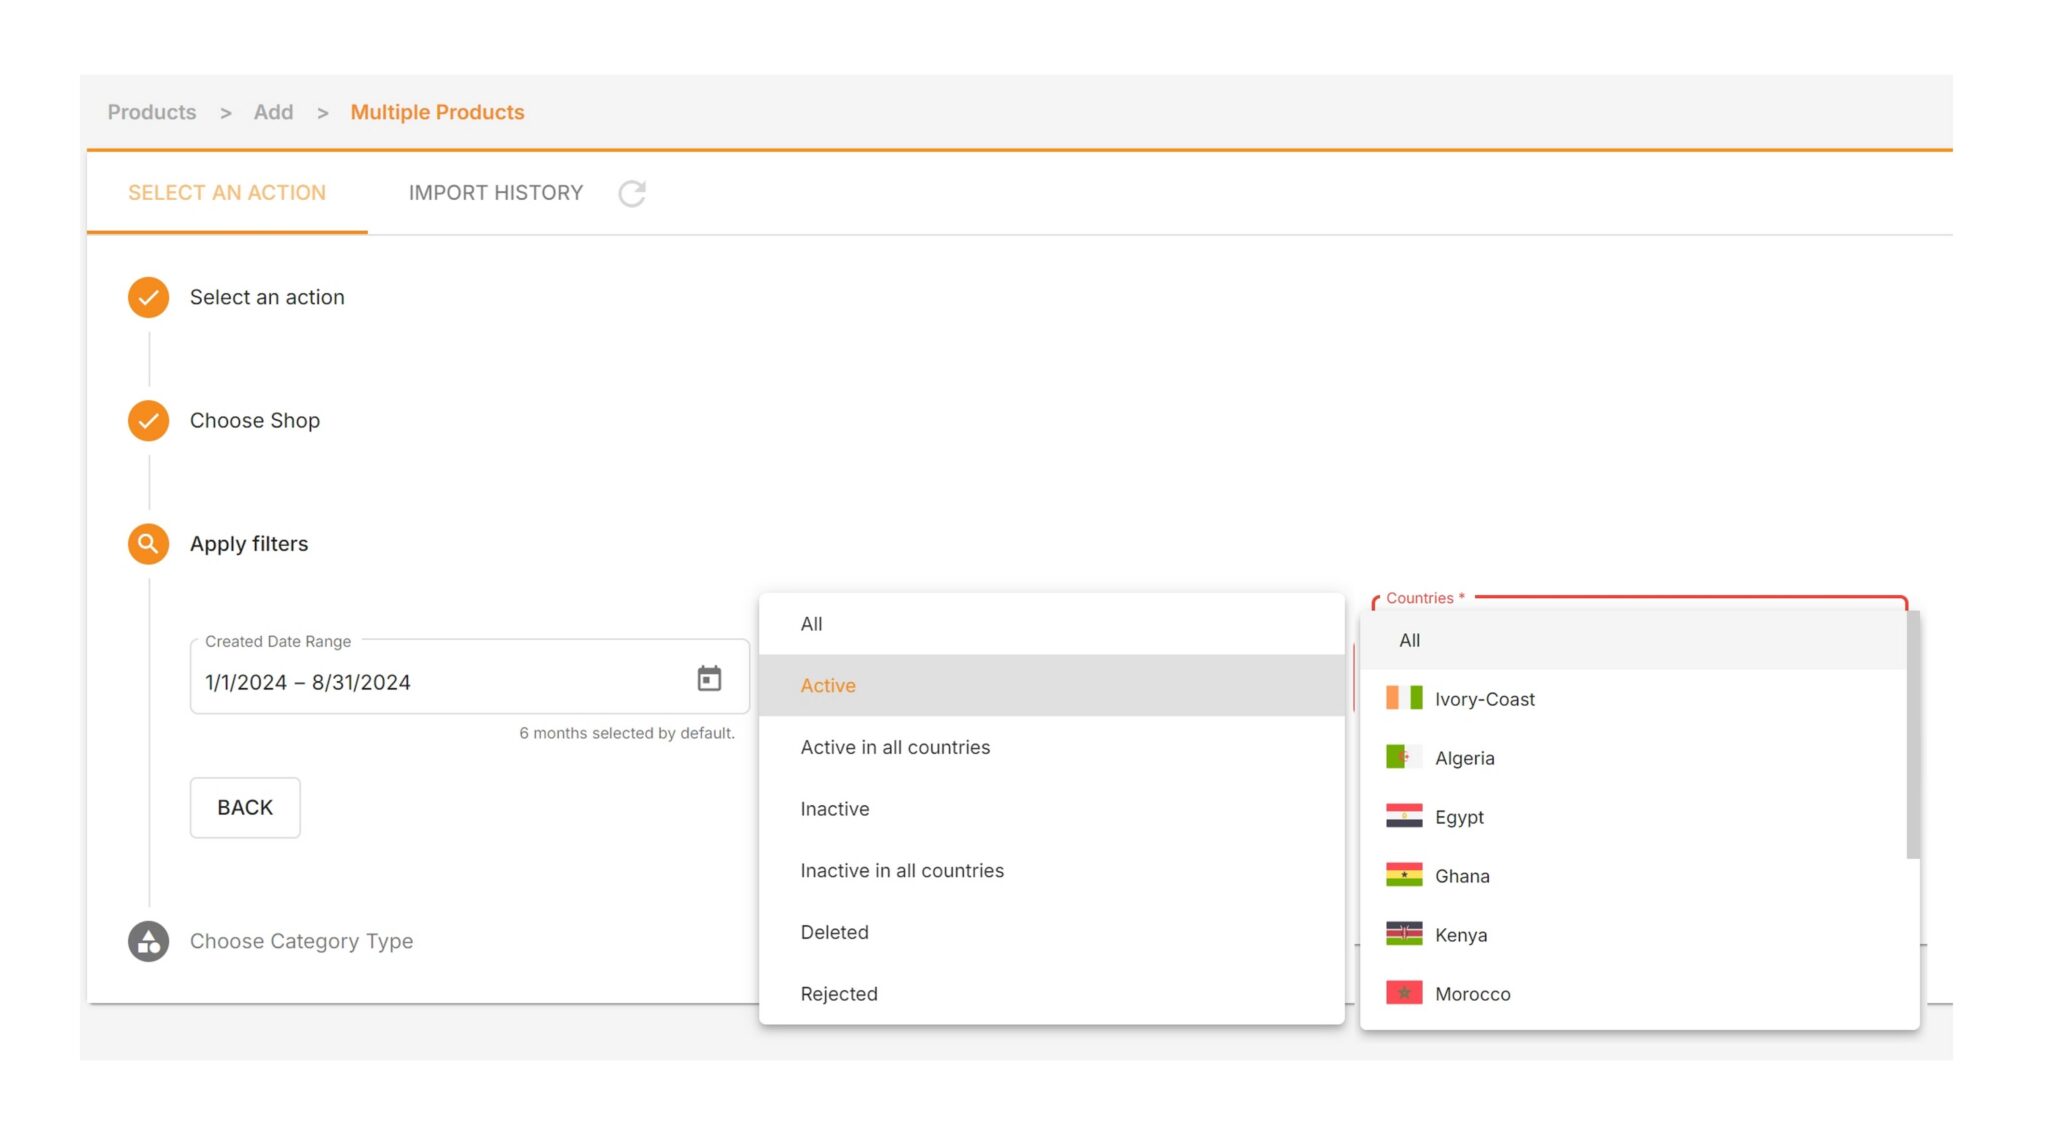
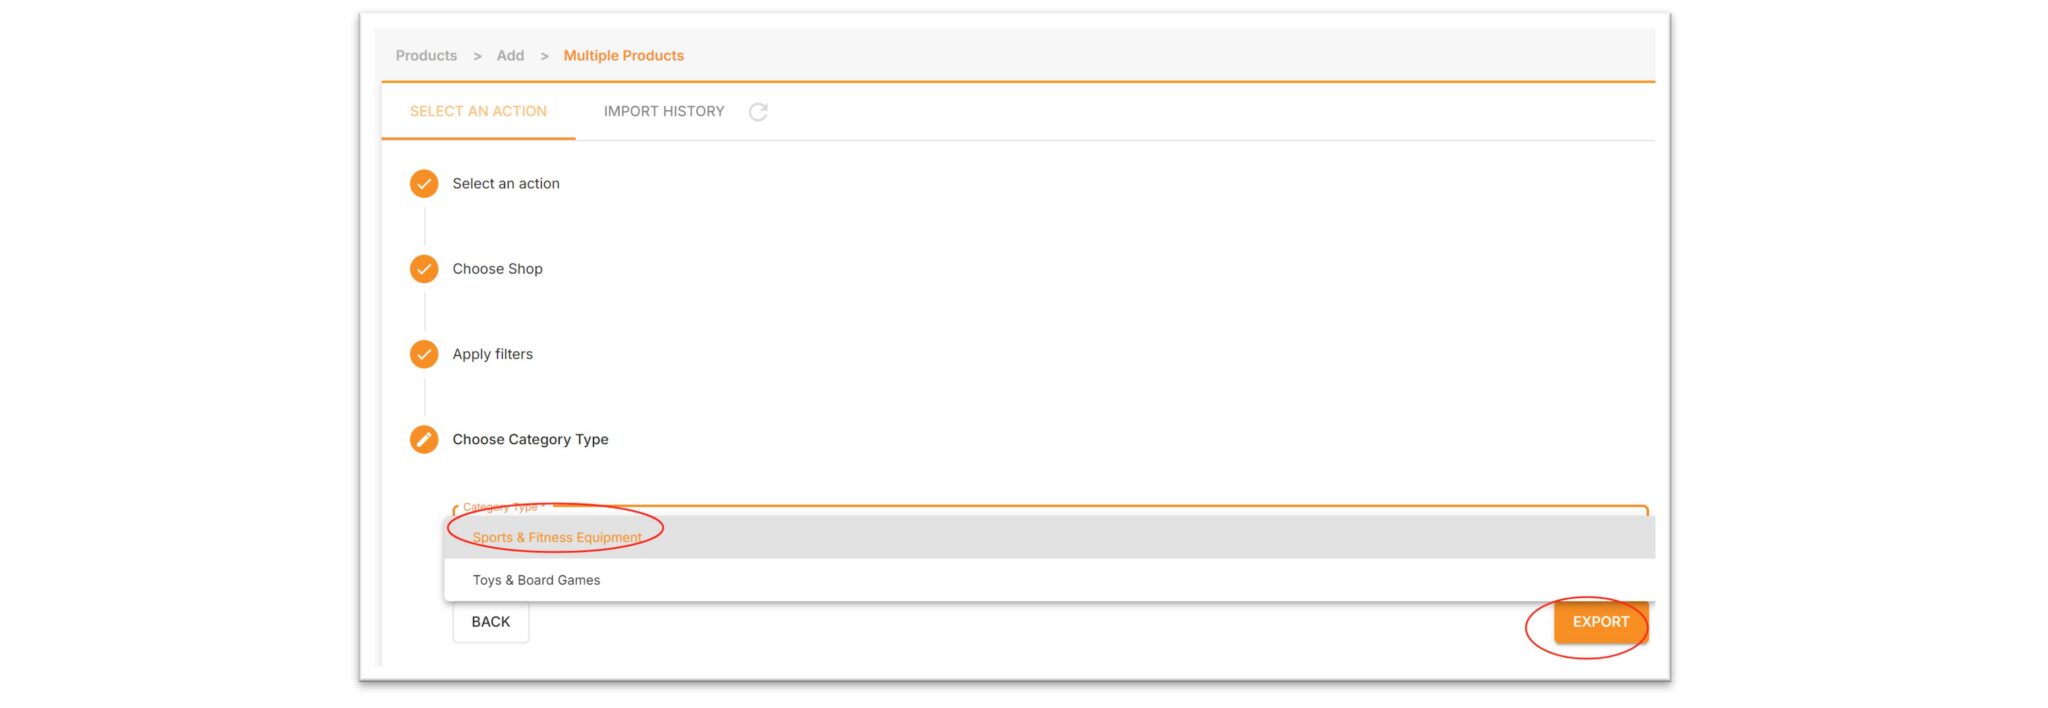
1.3 You can customize the store, product creation time, product status, country, and category. Finally, click “Export” to download the file. The following product statuses are available:
- All: Download all products.
- Active: Download activated products.
- Active in All countries: Download products activated in all sites.
- Inactive: Download inactive products.
- Inactive in All countries: Download products inactive in all countries.
- Deleted: Download deleted products.
- Rejected: Download products rejected by QC.
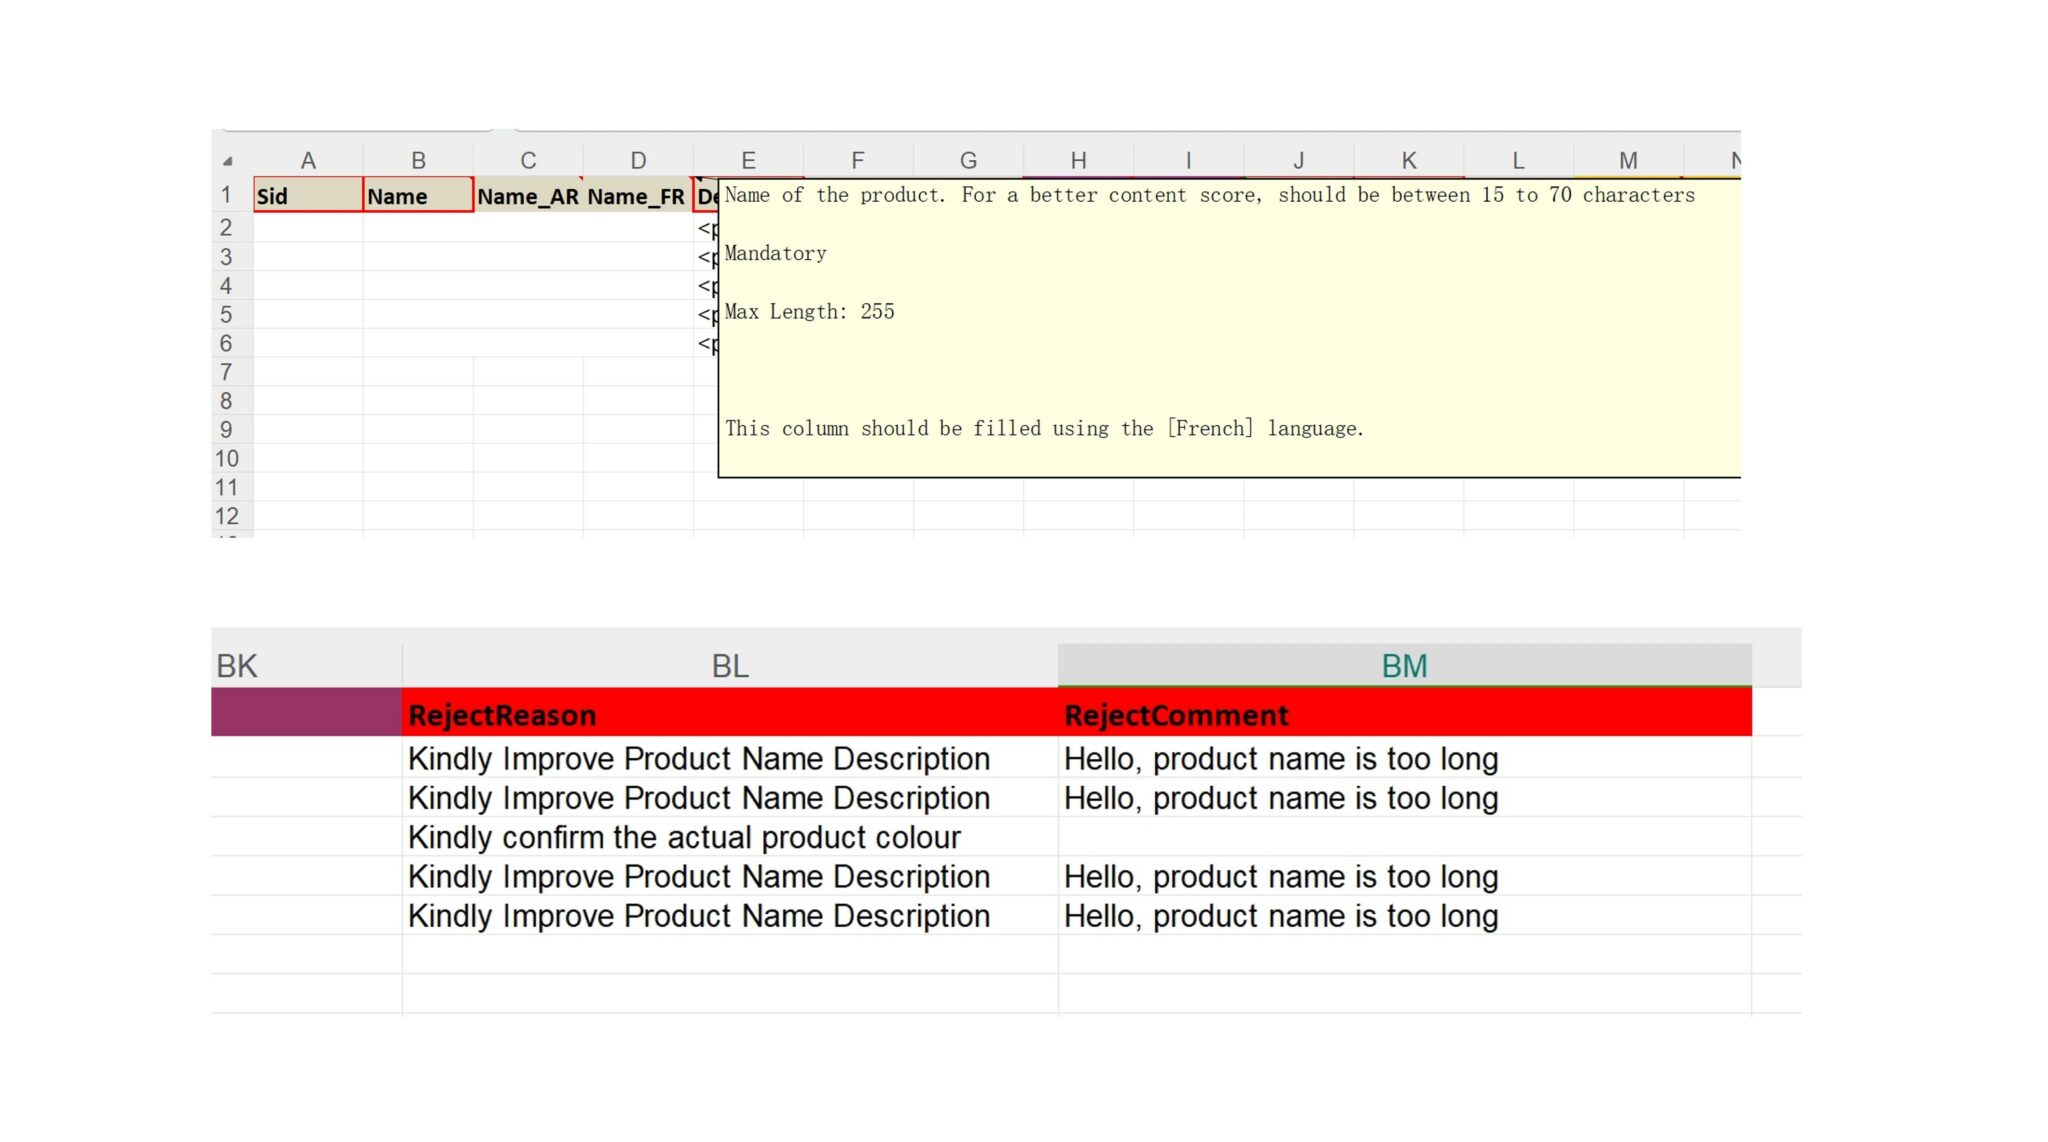
1.4 Download the form. Hover the mouse over the table header to display the field description.
1.5 When downloading in the “rejected” status, the last two columns of the file will specify the rejection reason (Reject Reason) and specific details (Reject Comment). Sellers can modify the relevant content according to the prompts.
1.6 Import the edited table, select Product for Type, select Update Products for Action, and finally drag and drop it into the box.
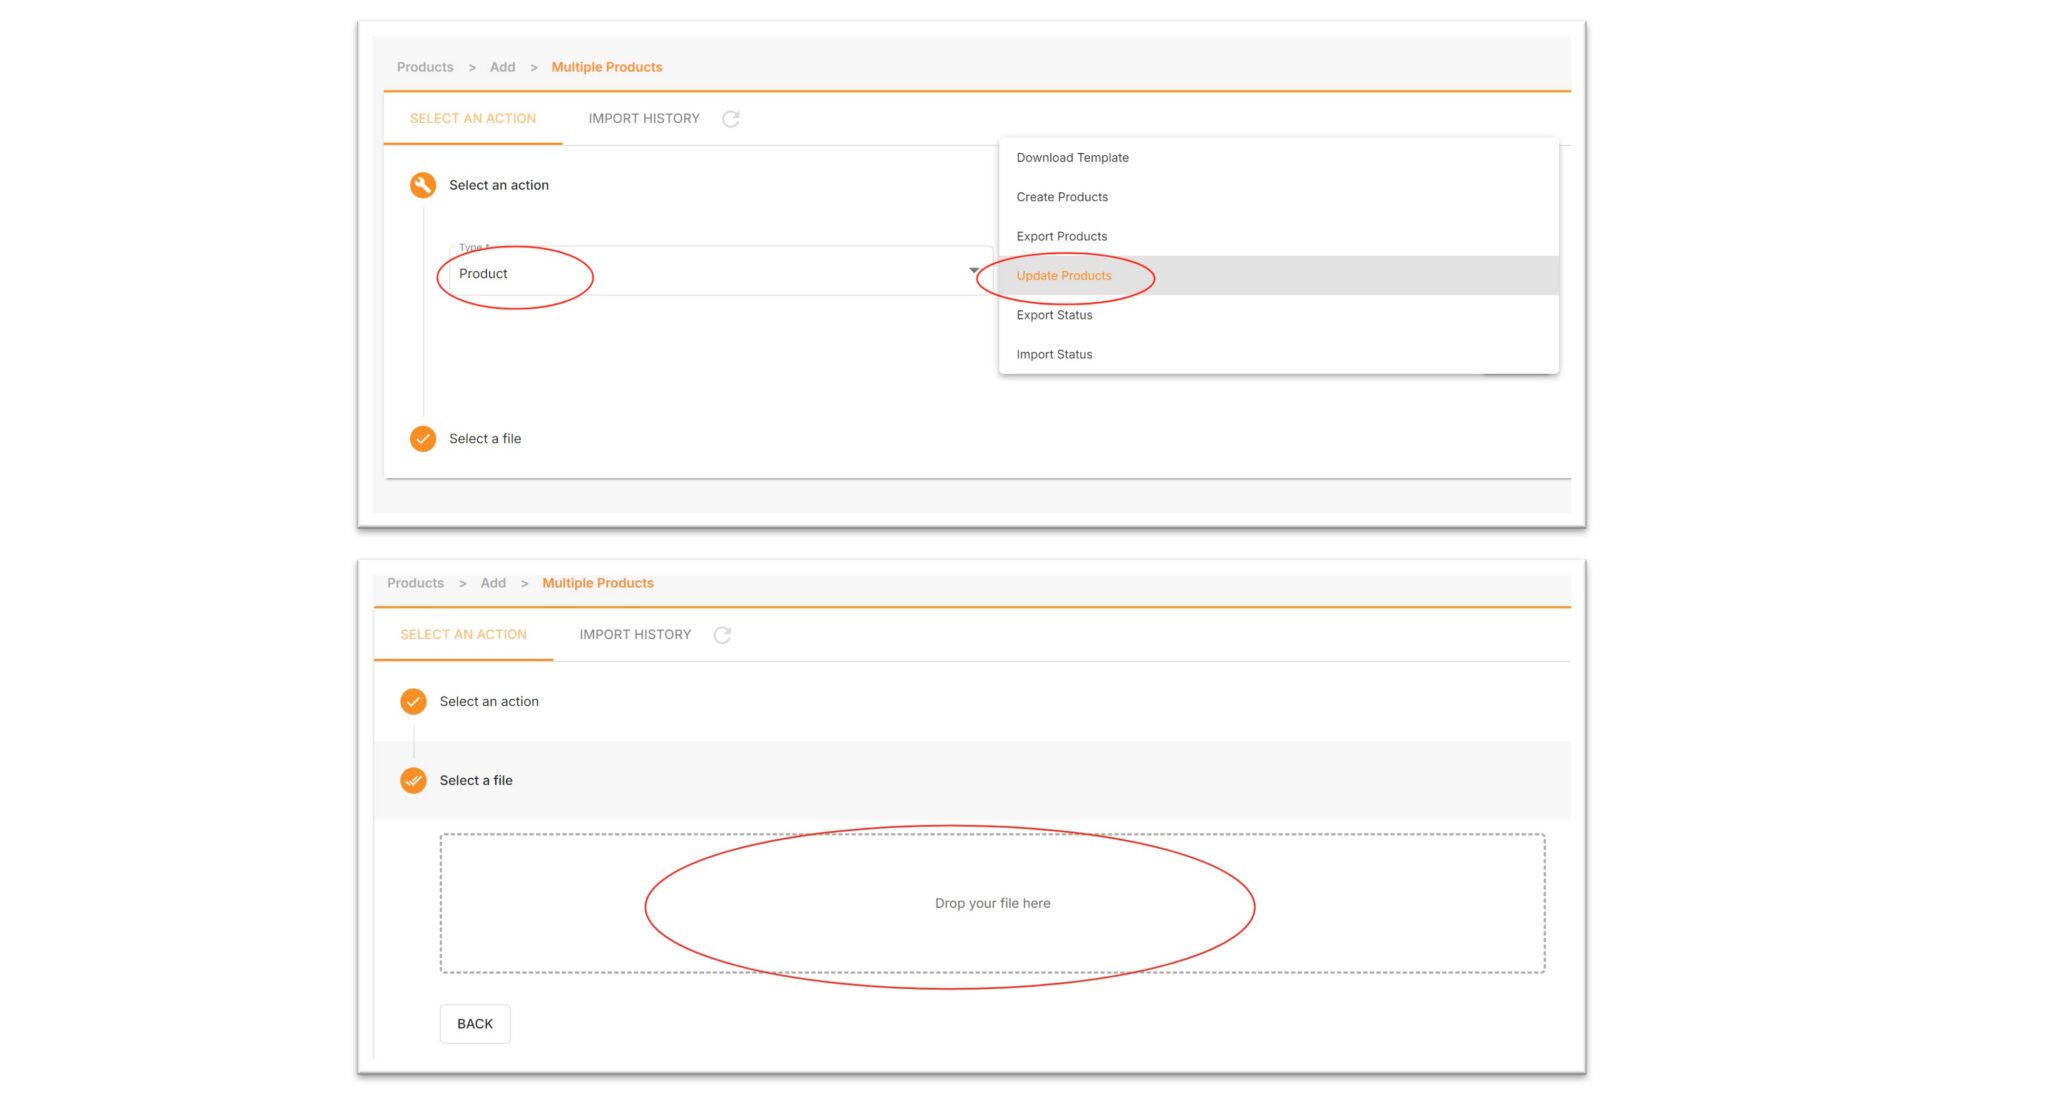
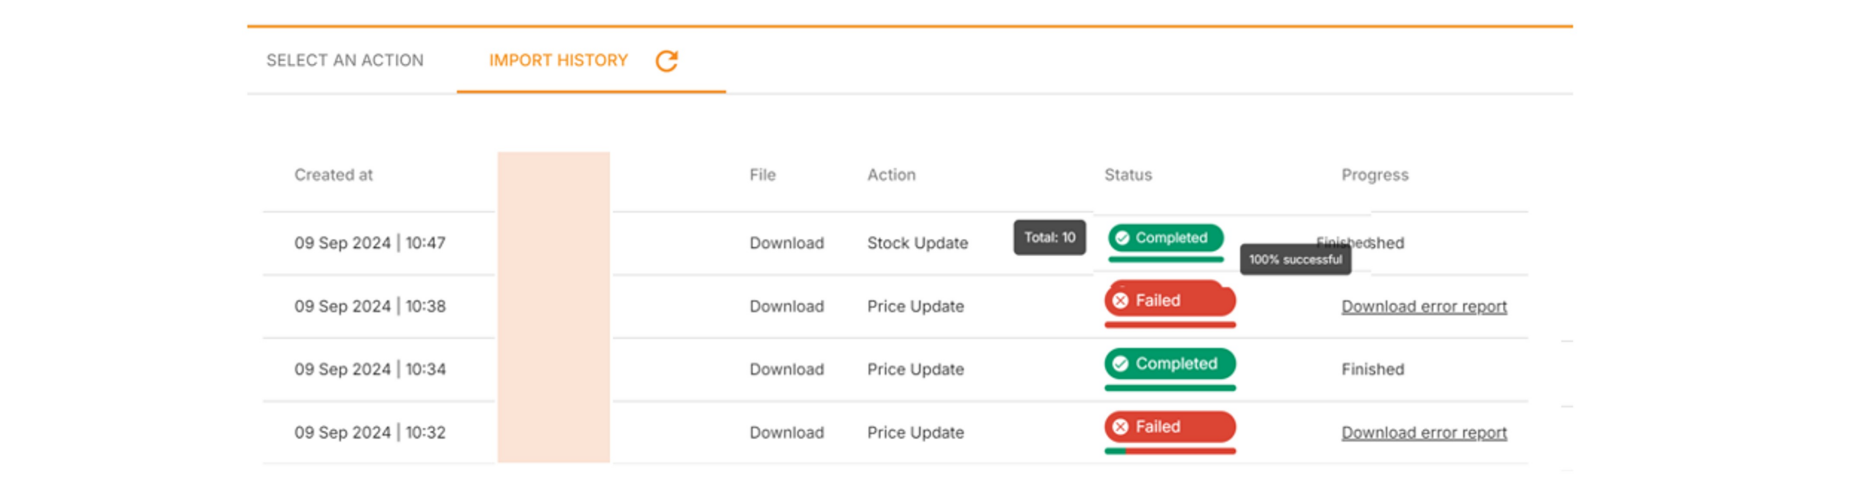
Check file upload results
The upload status can be divided into the following 5 types:
- Pending: Waiting to upload.
- Completed: Completed.
- In progress: Uploading in progress
- Failed: Upload failed. Please download the error report to check the reason.
- Failed: Partially failed. Click the progress bar to view the success percentage.
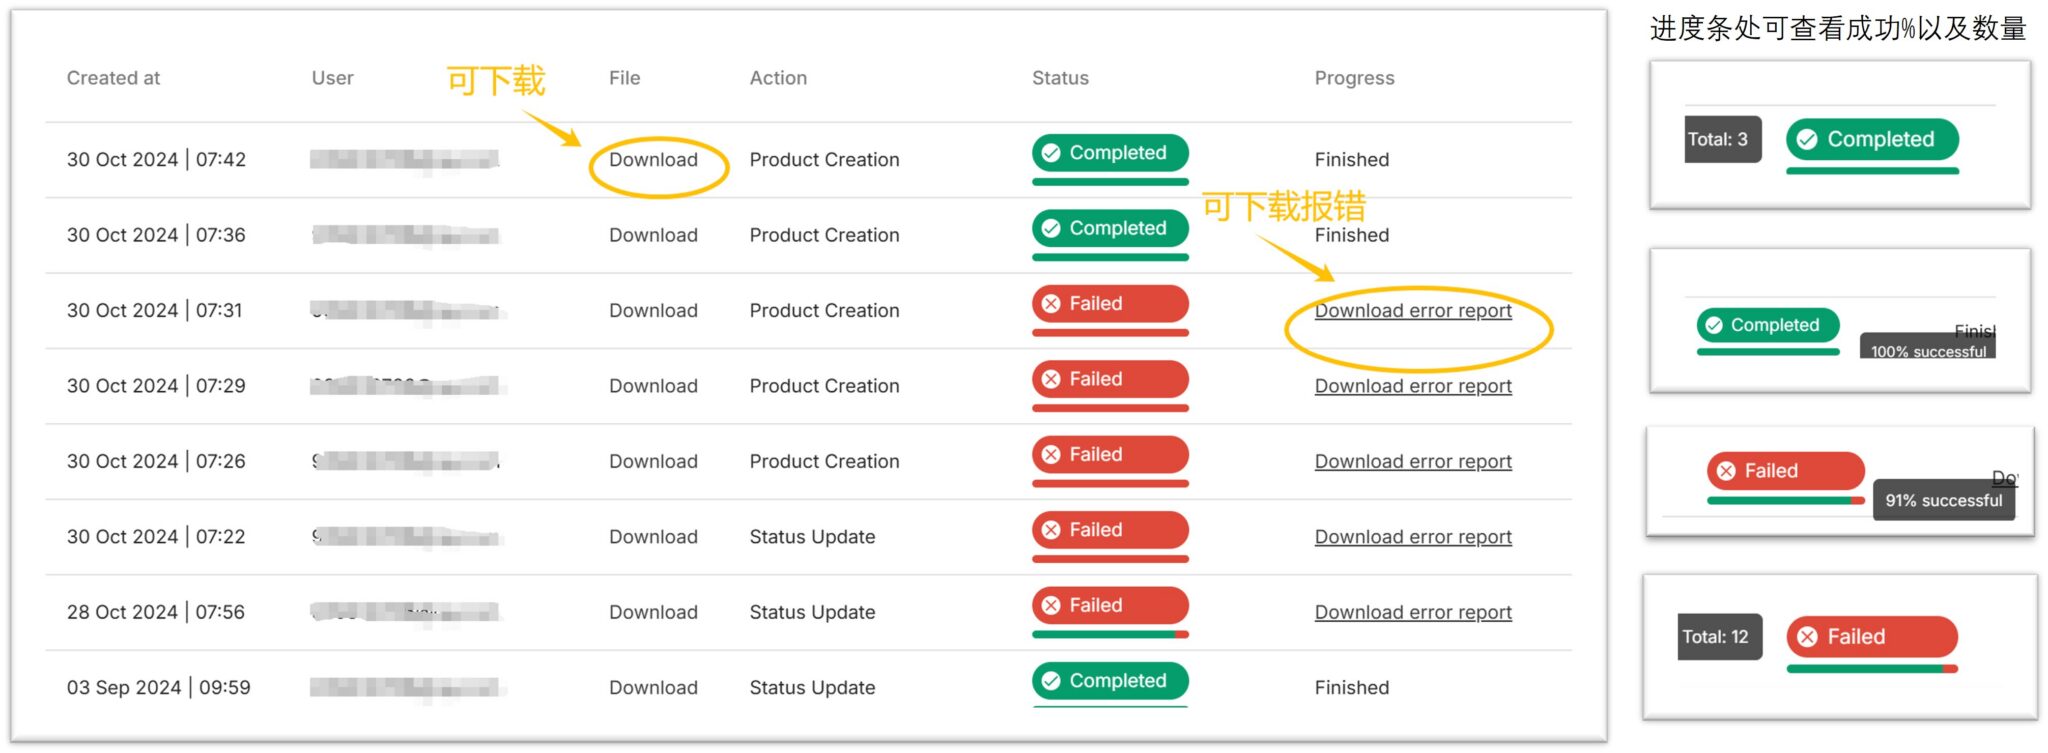
Analysis of the Upload History page:
- Created at: Creation time.
- User: Creator.
- File: The uploaded file can be downloaded.
- Action: Operation category.
- Status: Status, click on the status to view the completion progress percentage (%).
- Progress: “Fished” means completed, or download the error file.
2. Batch update of product inventory
The steps are as follows:
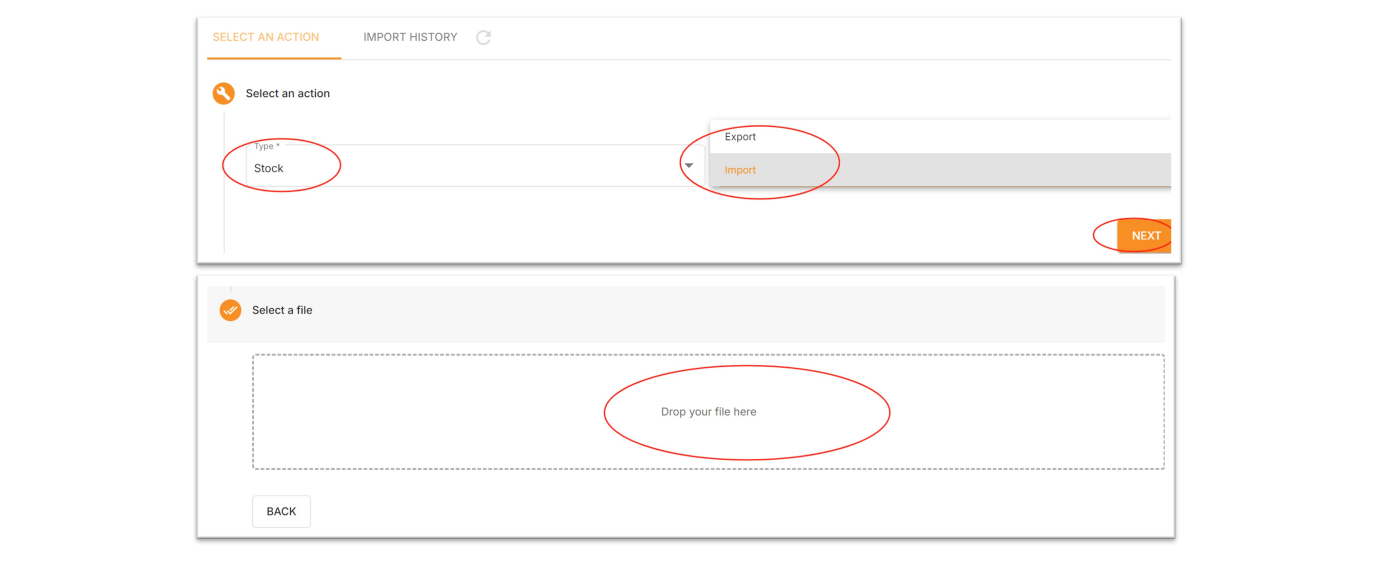
2.1 On the Manage Products page, click “IMPORT / EXPORT”
2.2 Select Stock for Type and Export for Action
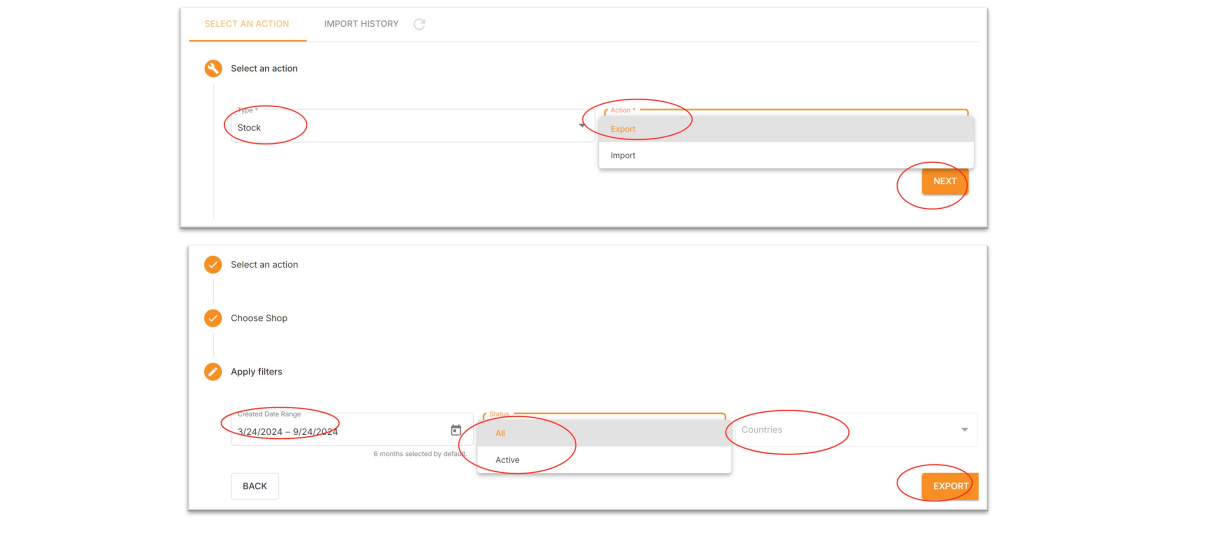
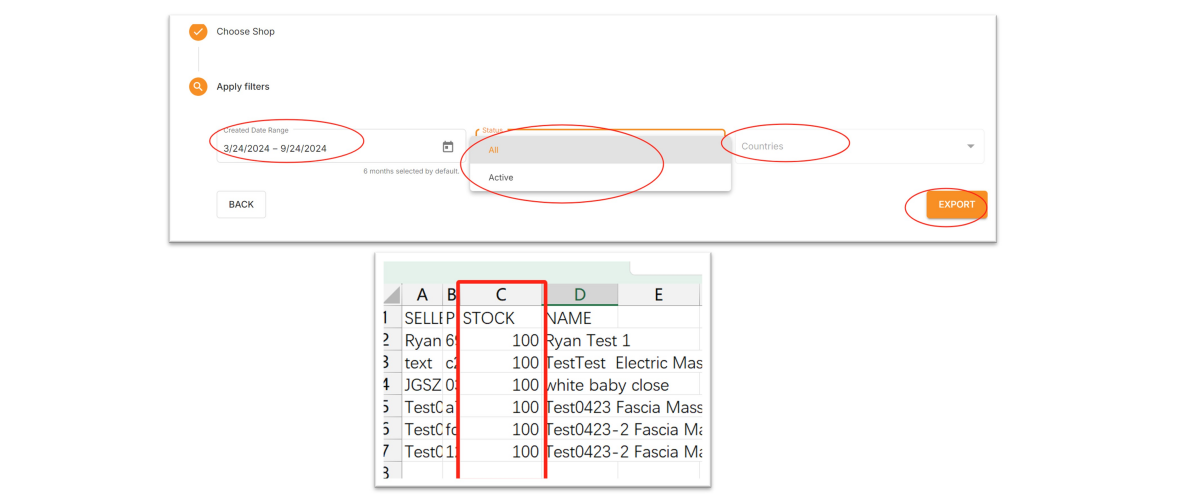
2.3 You can select the store and product creation time as filtering criteria, then click Export.
2.4 After downloading the form, fill in the new inventory in the stock column (global sellers share a single inventory across all sites, and orders from any site will deduct from this inventory).
2.5 Import the edited table, select Stock for Type, select Import for Action, and finally drag and drop it into the box.
Check file upload results
Click on Upload History to view upload results, where you can check:
- Created at: Creation time.
- User: Creator.
- File: The uploaded file can be downloaded.
- Action: Operation category.
- Status: Status. Click on the status to view the completion progress percentage (%).
- Progress: “Finished” means completed, or download the error file.
There are 5 types of statuses:
- Pending: Waiting to upload.
- Completed: Completed.
- In progress: Uploading in progress.
- Failed: Upload failed. Please download the error report to check the reason.
- Failed: Partially failed. Click on the progress bar to view the success percentage.
3. Batch Update of Product Prices
The brand-new batch price management function is now online! Now, sellers can quickly and accurately update your product prices by exporting and importing product spreadsheets. This new feature saves you from the tedious task of modifying prices one by one. Whether you want to adjust the prices of products in a specific country or even all countries at once, it can be easily done.
How to use the batch price modification function? The following steps will help you get started quickly:
3.1. Log in to your Jumia Vendor Center account
3.2. Export product price information
In the left navigation bar, click Products > Manage Products in sequence.
In the upper right corner of the page, find and click the Import / Export button.
On the new page that pops up, select Select an action > Price.
Sellers have two export options:
Export Global (default for all countries): Export product information for all countries. If you want to adjust the price of the same product in all countries, please select this option.
Export Countries (Export product information of specified countries): Select one or more specific countries to export only the product prices of these countries. If you only want to adjust the product prices for a certain country individually, please select this option.
After making your selection, click Export, and wait for the system to generate the spreadsheet file and download it.
3.3 Edit the price spreadsheet
When you open the downloaded CSV file, you will see the following key columns:
- PRODUCT_ID: Product ID, do not modify.
- SELLER_SKU: Your SKU, do not modify.
- PRICE: This is the price you need to modify.
- SALE_PRICE: This is the promotional price of the product.
Important notes:
When modifying prices, please pay special attention to the date format. You need to change the date format in the spreadsheet from YYYY/M/D HH:MM to YYYY-MM-DD HH:MM. For example, 2025/8/13 9:12 needs to be modified to 2025-08-13 09:12.
Ensure that the price is in the correct numerical format, which can retain two decimal places.
3.4 Import the modified table
After modifying and saving the CSV file, return to the Jumia Vendor Center.
On the Import / Export page, select Select an action > Price.
In the Action column, select Import.
Click Drop your file here or Select a file to upload your modified table.
3.5 Check the import results
After the upload is complete, you can check the import status on the Import History page.
- Completed: Indicates that the file has been successfully uploaded and the price update is completed.
- Failed: Indicates that the upload failed. You can click Download error report to check which row or column has incorrect data format, so that you can modify it and upload again.
Summary
This new feature allows sellers to manage product prices more flexibly and efficiently, especially when conducting large-scale promotions or market price adjustments, which can greatly save time.