
Product Creation
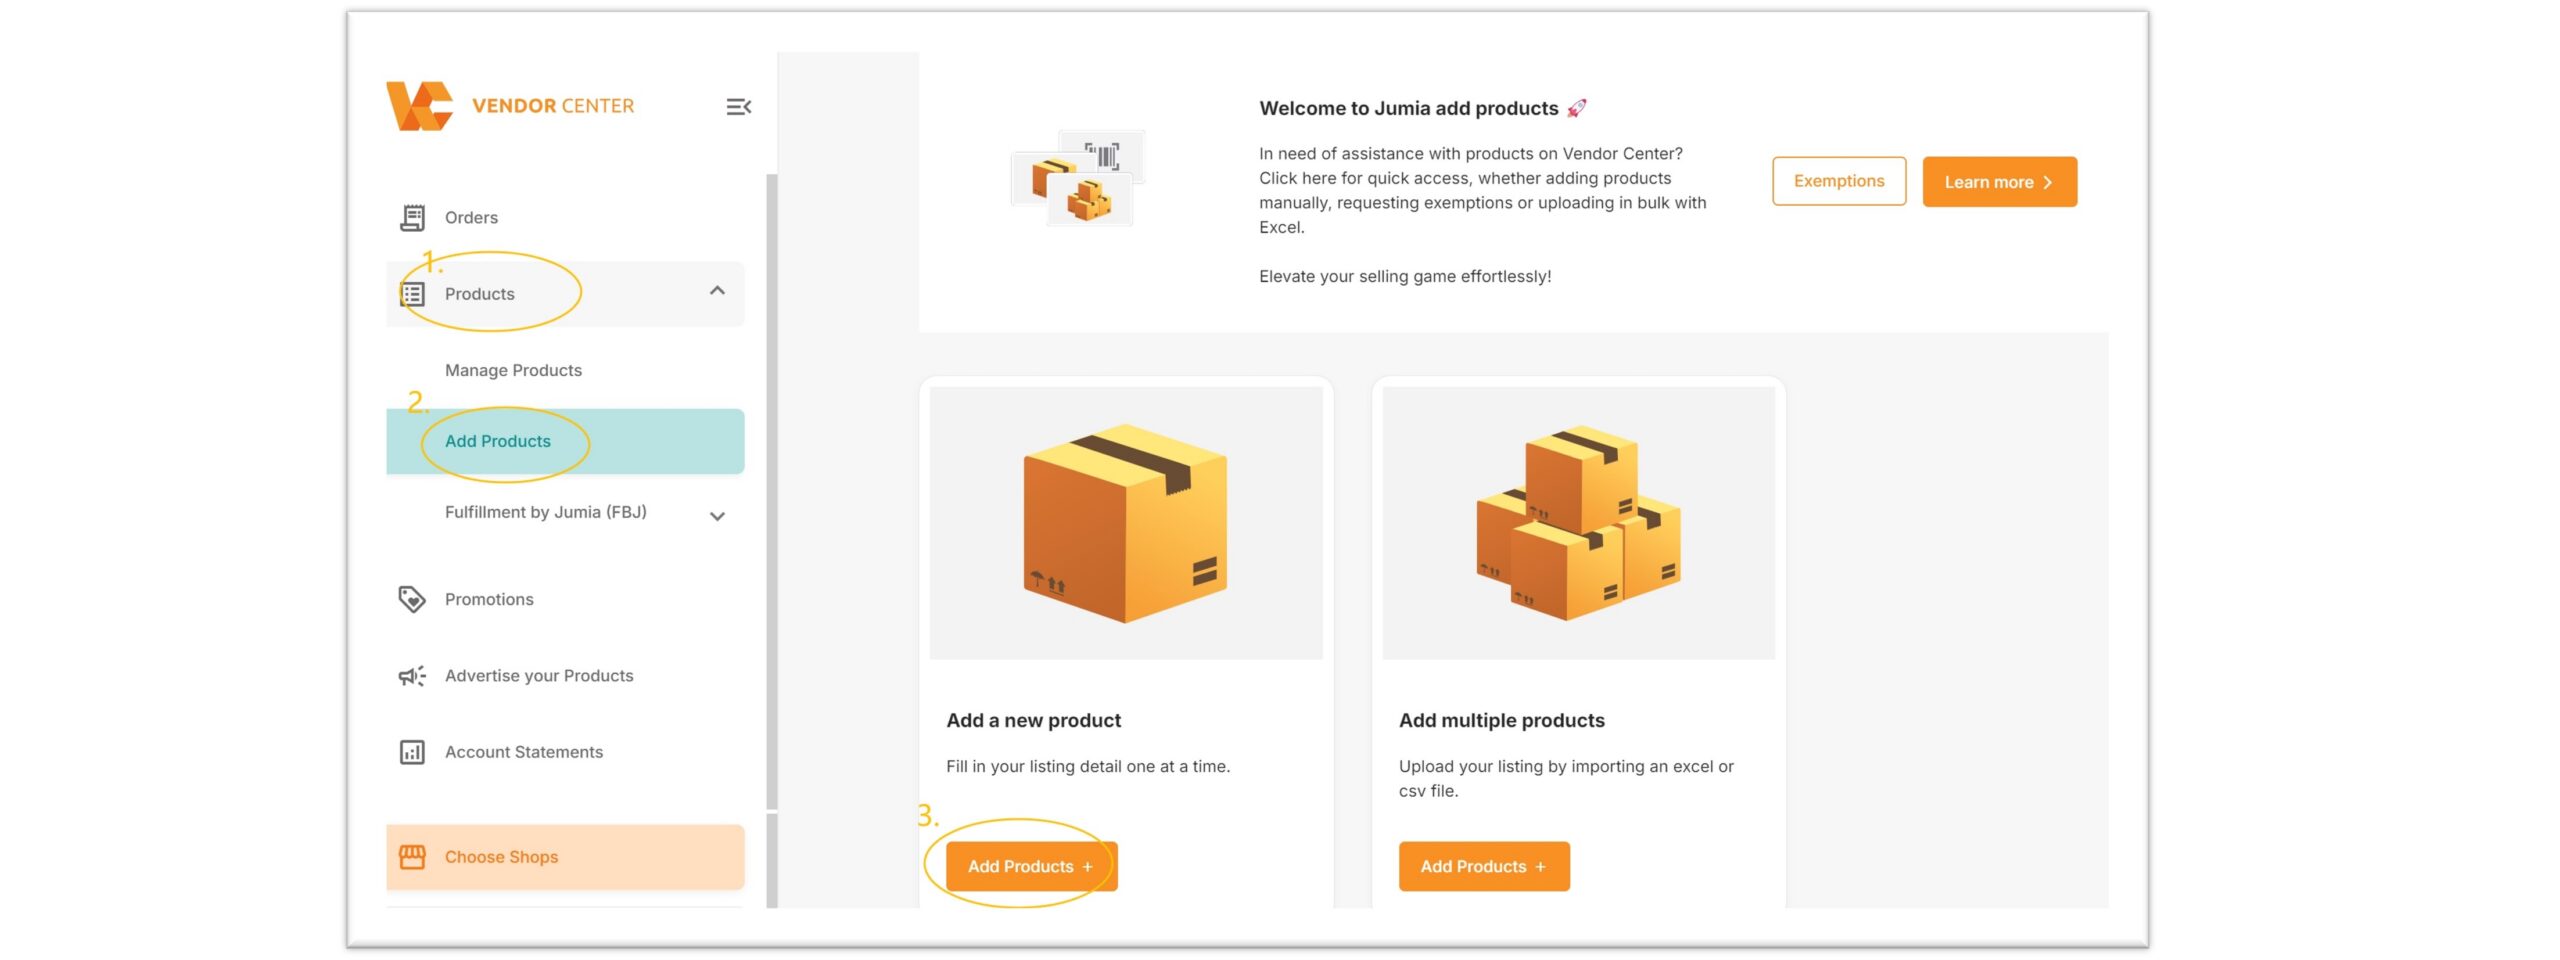
The creation path is as follows:
1) Products > Add Products > Add a New Product
2) Products > Manage Products > Add Products
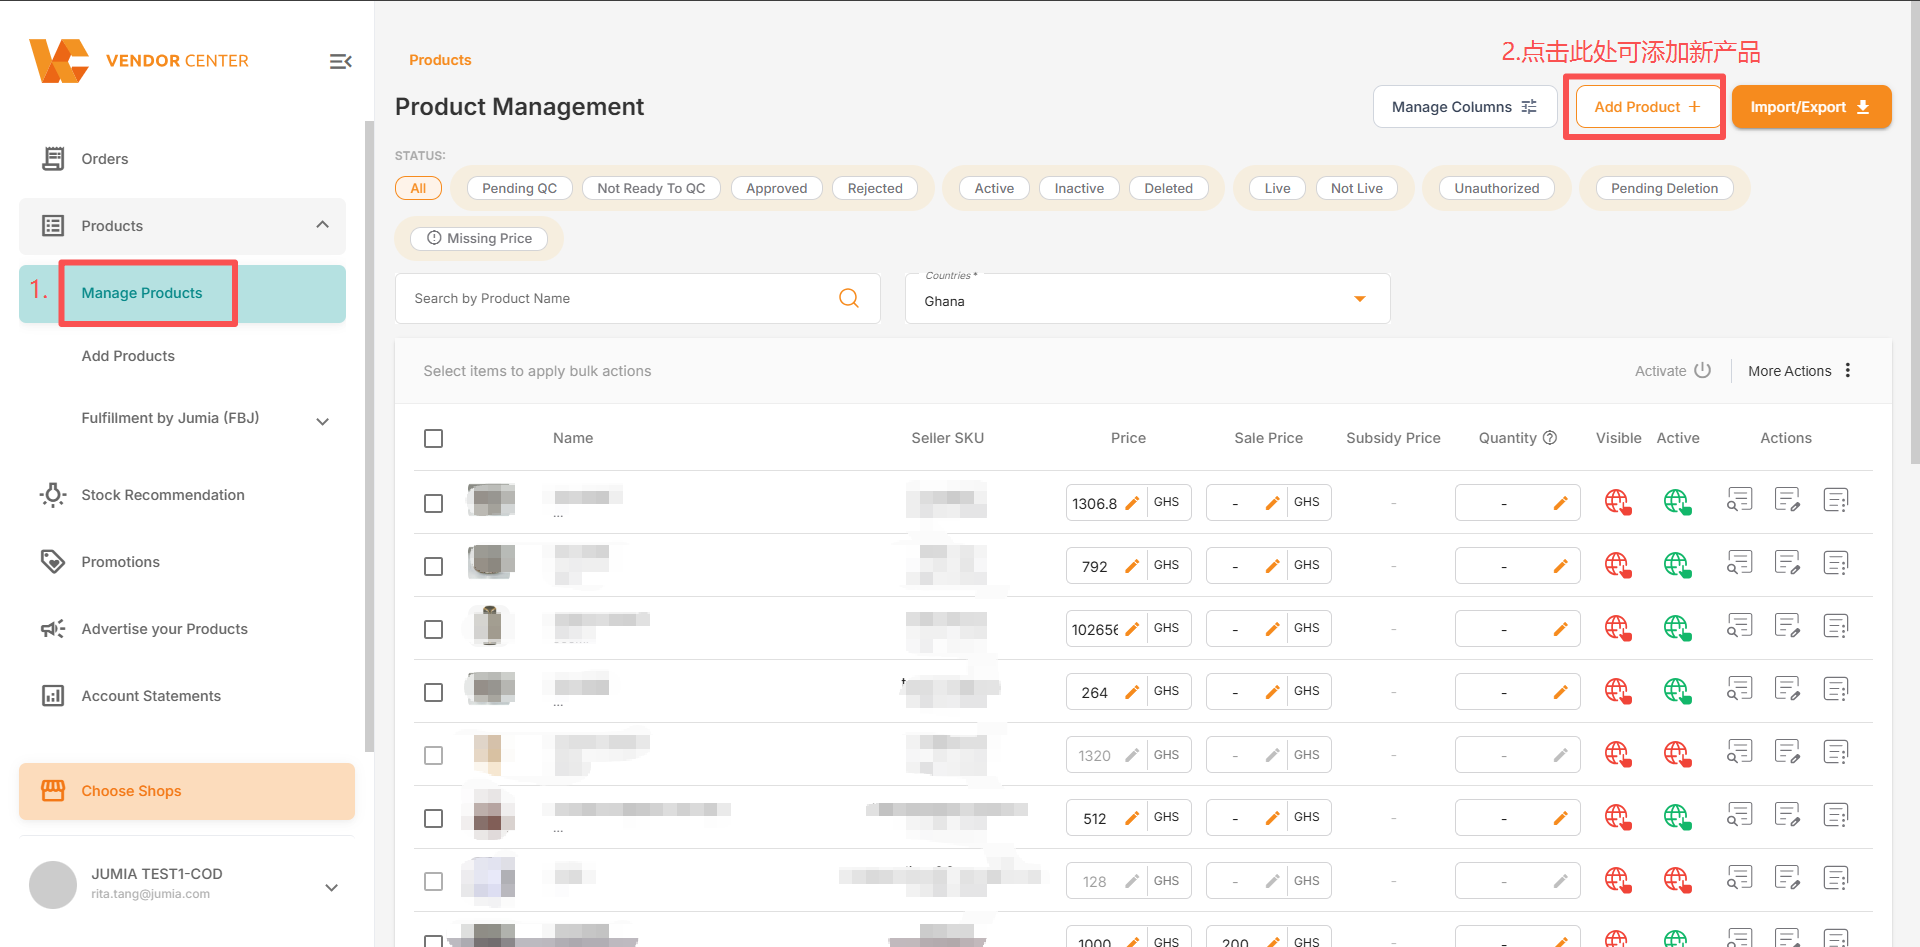
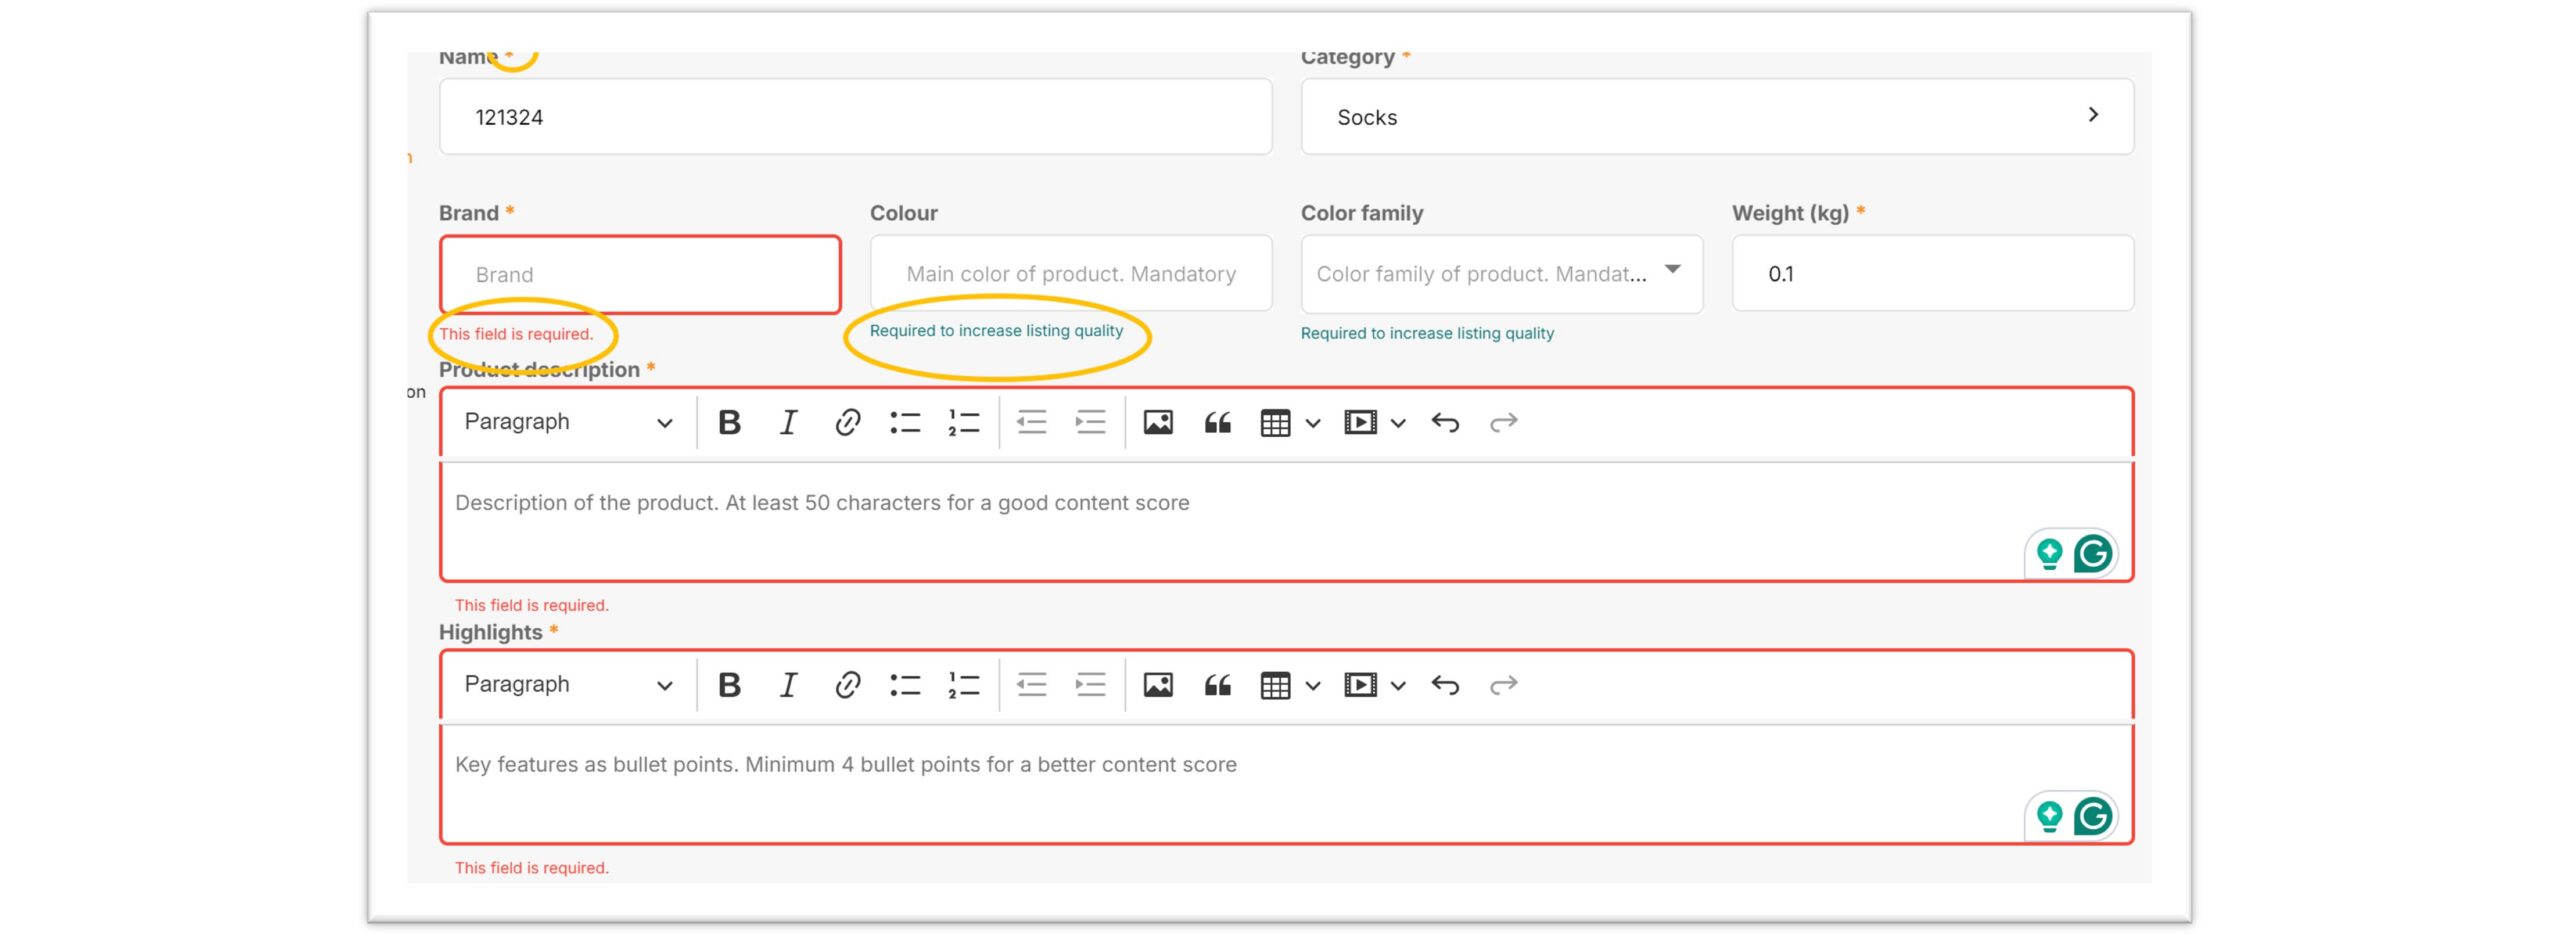
Note: Fields marked with an asterisk (*) are mandatory; the product cannot be created if they are left blank. Red text indicates that the corresponding field has not been filled in or the content does not meet the required standards. Green text indicates that filling in that section will improve the product’s score.
Step 1: Enter Product Information
1. Image
- The first main image is mandatory; up to 8 images can be uploaded.
- Image dimensions must be between 500×500 and 2000×2000 pixels.
- A white background is recommended.
- Watermarks are not permitted.
- The maximum file size is 2MB.
If the pixel dimensions do not meet the requirements, the following error message will appear:

2. Title (Name)
The title should be between 15 and 70 characters in length; it should not be excessively long.
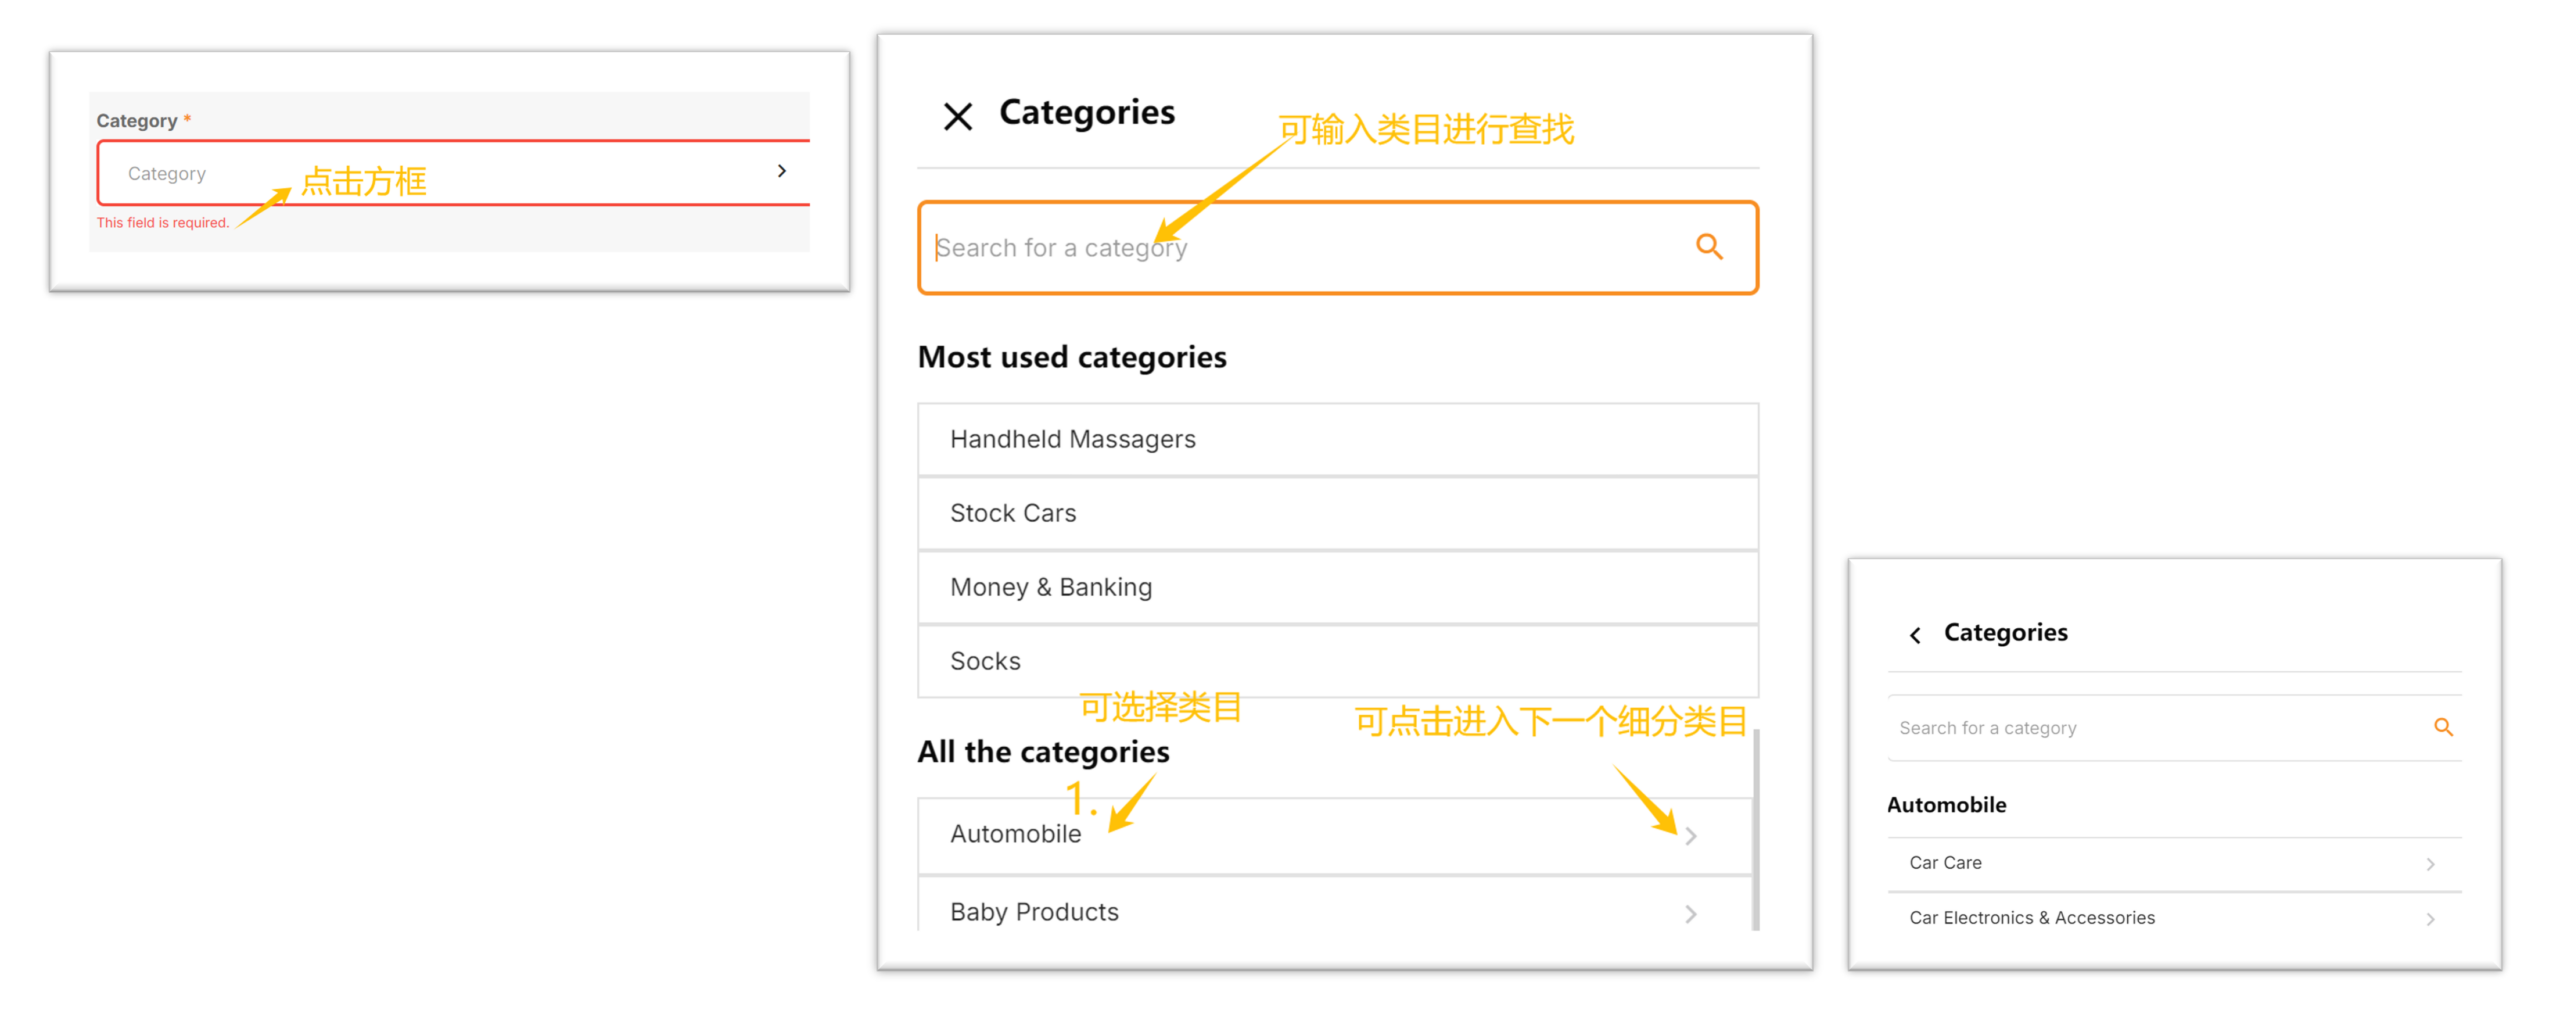
3. Category
In VC, you can select a category for the product in the following two ways:
- Method 1: Manual Search
After clicking the category field, you can either enter category keywords directly into the search box or select the category by navigating through the levels of the dropdown category tree.
- Method 2: AI-Powered Recommendations
After entering the product title, the system uses data science models to automatically recommend up to five suggested categories; simply click on a category to populate the field instantly.
Key Points:
⚠️ Critical Constraint: Category selection is irreversible; please double-check the full category path thoroughly before your initial submission!
Strict Modification Limits: Once a product is created, the system only permits minor adjustments within subcategories sharing the same attributes. Click to view the full category tree.
High Cost of Error: If a major category error is discovered after the product has shipped, the system will permanently lock the listing, making cross-category changes impossible.
Cascading Negative Effects: Incorrect category selection leads to inaccurate system indexing, mismatched storefront traffic, and low conversion rates. Since the issue cannot be rectified in the backend, the product is forced to remain in the incorrect state.
If certain categories are not activated in certain countries, the following error message will appear.
The category selected is not active on all the shop countries. Click here to request the activation of the category.

Click the link (here) to apply for activation of this category (please be sure to select the category as specified below):

4. Brand
Please refer to the brand guidelines for specific details.
5. Product Description and Highlights
Both the product description and highlights are mandatory fields.
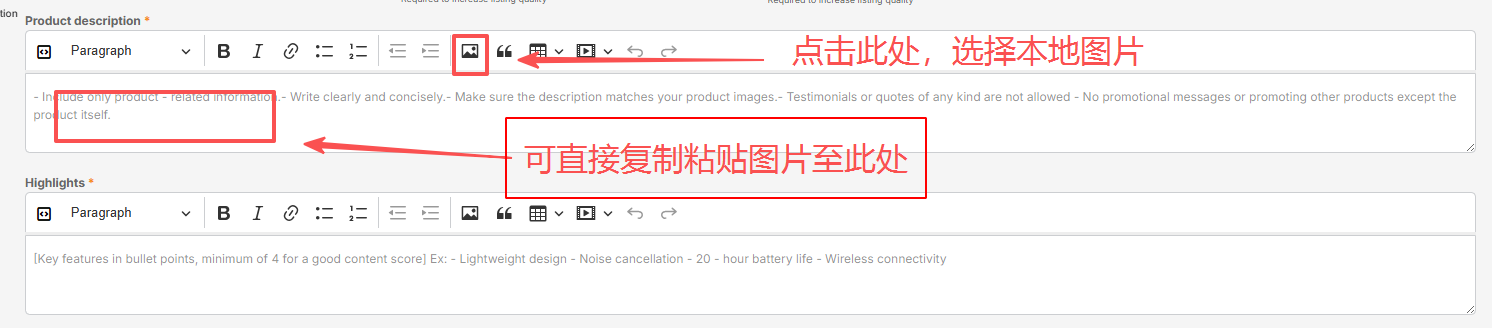
- Steps to add images to the product description:
- Click the “Insert Image” icon on the editor toolbar to upload and insert an image.
- Quickly add images by dragging and dropping, or by copying and pasting image files directly into the editing area.
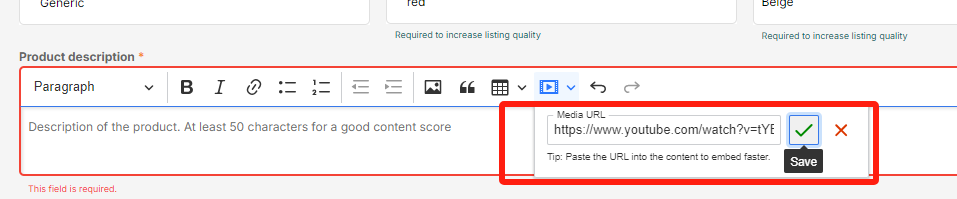
- Steps to add a video to the product description
- Copy and paste the full YouTube video link here; currently, only web-based YouTube links are supported.
-
- Scroll down the page, locate the “Youtube ID” field, and fill it in completely.
Youtube ID location: youtube.com/watch?v=abc123xXYz_45; the ID appears after “?v=”.

Step 2: Variants
Important Notes!!!
1. Variant Specifications: Only single-dimension attributes are supported. Standard permissible variant attributes include size, power, capacity, age group, etc. Variants must share the same set of images; therefore, the variant attribute must not affect the product’s appearance (e.g., color or shape).
If using color as a variant attribute prevents the SKU from being successfully listed, please delete it and create a new SKU with the correct variant configuration.
2. When there are no variants, enter “…” in the field instead. Do not enter color-related terms (e.g., “white surface with a black base”), as this increases the risk of the system incorrectly identifying color as a variant attribute.
Note: Do not mix standard variant information with “…” (e.g., formats like “S, M, …”), as this may cause display issues on the storefront after the product is listed.

Example:
For clothing items available in different colors, a separate product must be created for each color.
The iPhone 12 and iPhone 15 cannot be grouped as variants under the same product listing due to their differing appearances.
Click the areas indicated by the arrows to add or remove variants:
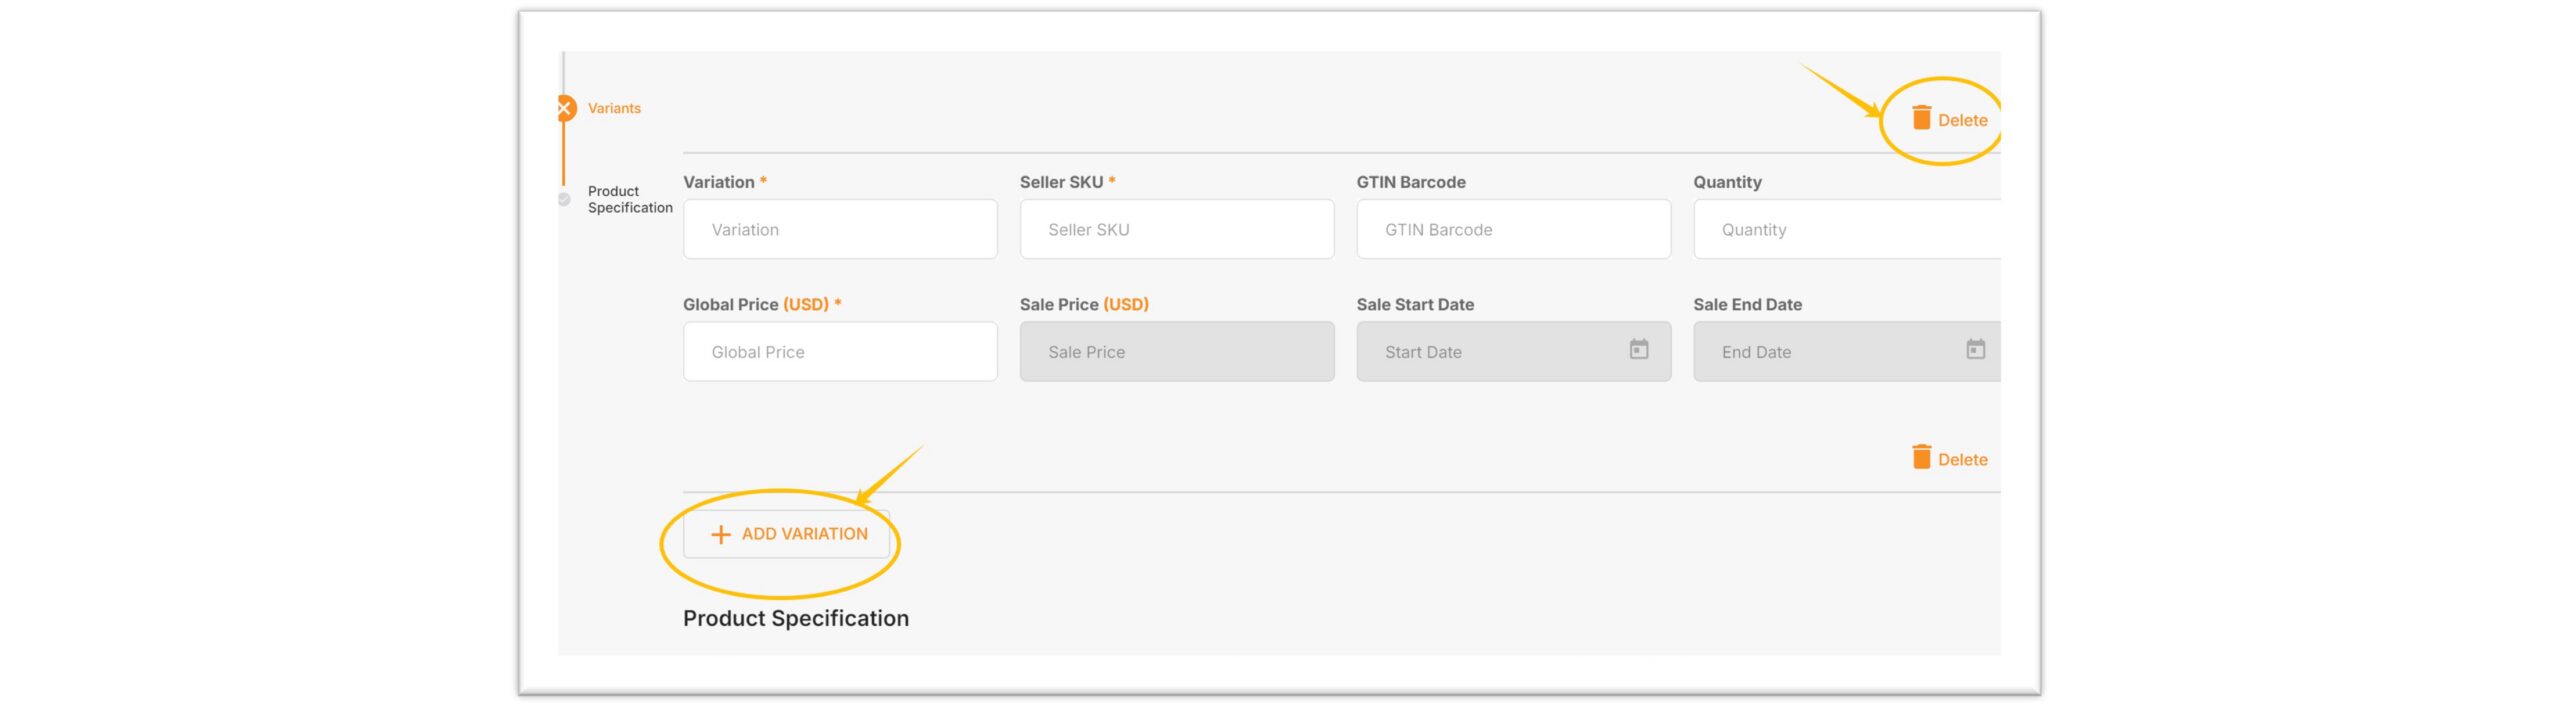
Required Information for “Other Variants”
- Seller SKU: A string of characters created by the seller.
- Format Requirements: A combination of letters and numbers is recommended (at least 2 characters); e.g., Shoes-A-39.
- Uniqueness: Must be unique. If you receive the error message “A product with the same seller SKU already exists…”, please use a different code.
- Irreversibility: Once the item passes QC review, the Seller SKU cannot be edited; please verify the information carefully before submission.

- Quantity: No need to fill this in; inventory is managed by the JUMIA team and is based on the actual quantity received into the warehouse.
- GTIN Barcode: Optional; please click here for details.
- Local Currency Pricing (LCY)
Enter the price directly in the local currency; the currency indicator next to the “Price” field is fixed to display the local currency code for the specific site (e.g., NGN, KES, EGP, XOF, etc.). You can modify the local currency price directly, and changes made here will not affect the product’s price in other countries.
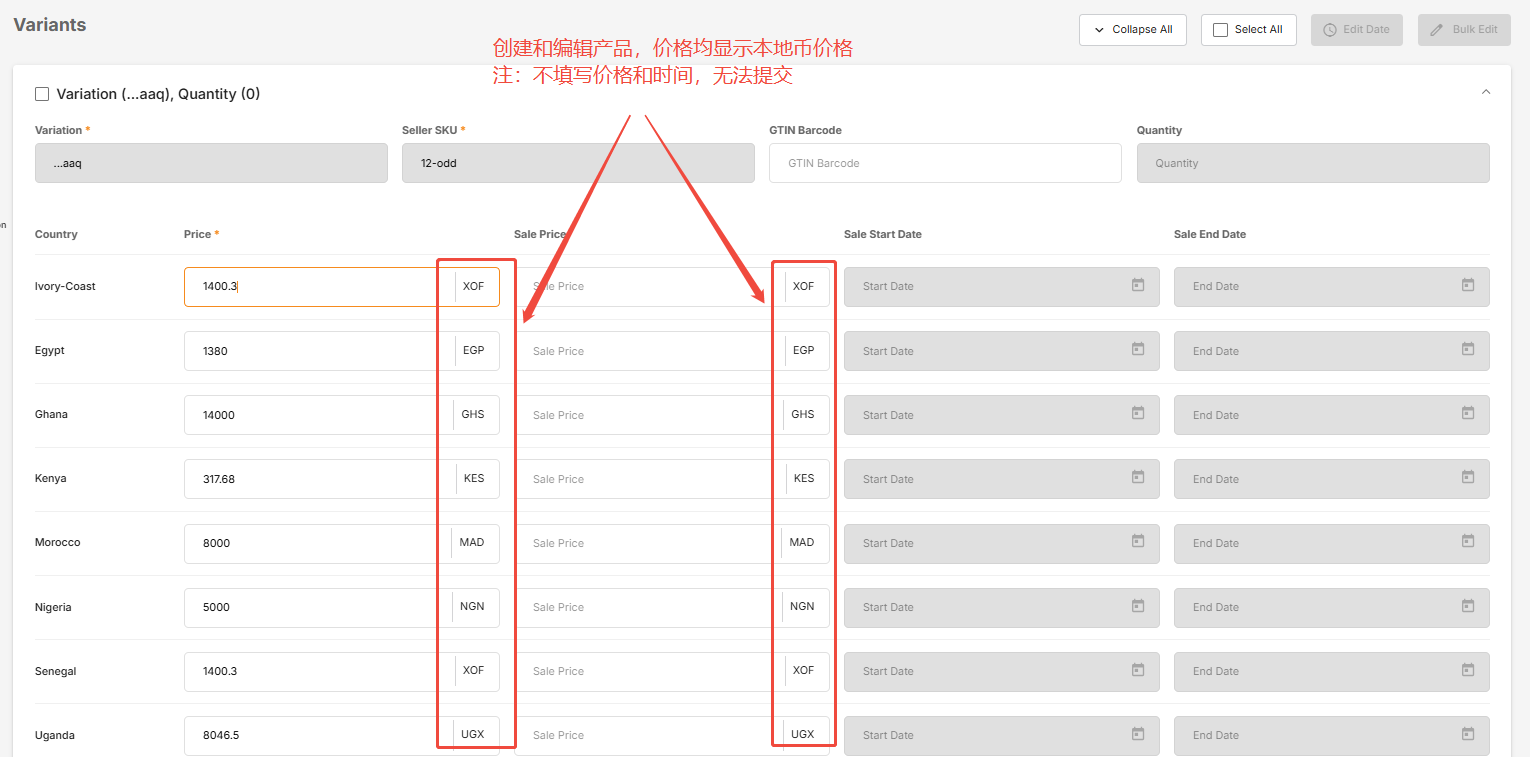
- Sale Start Date & Sale End Date: Sale Start Date. If a sale price is entered, these two date fields are mandatory. The Sale Start Date must be later than the time the product information is submitted; it is recommended to set it for at least 5 minutes after the current time.
Step 3: Product Specification
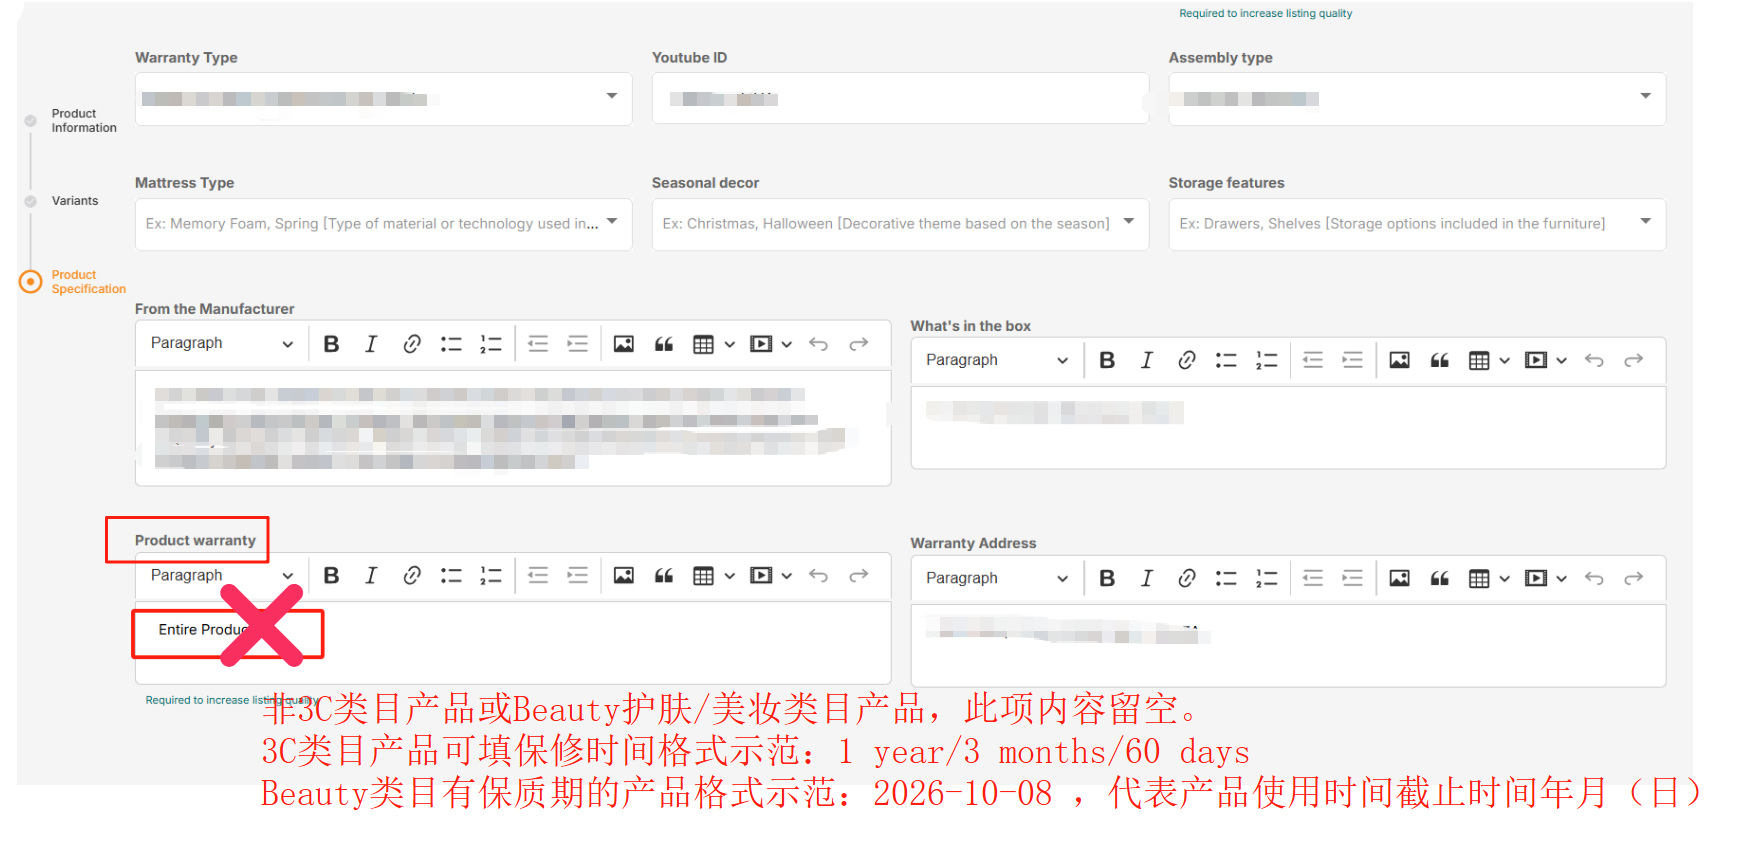
1. Mandatory fields (marked with *): Please ensure these are fully completed; otherwise, the form cannot be submitted.
2. Optional fields: If no relevant information applies, please leave them blank; there is no need to enter “N/A” or any other text.
Please pay special attention to the requirements for the “Product warranty” field, as shown in the image below.
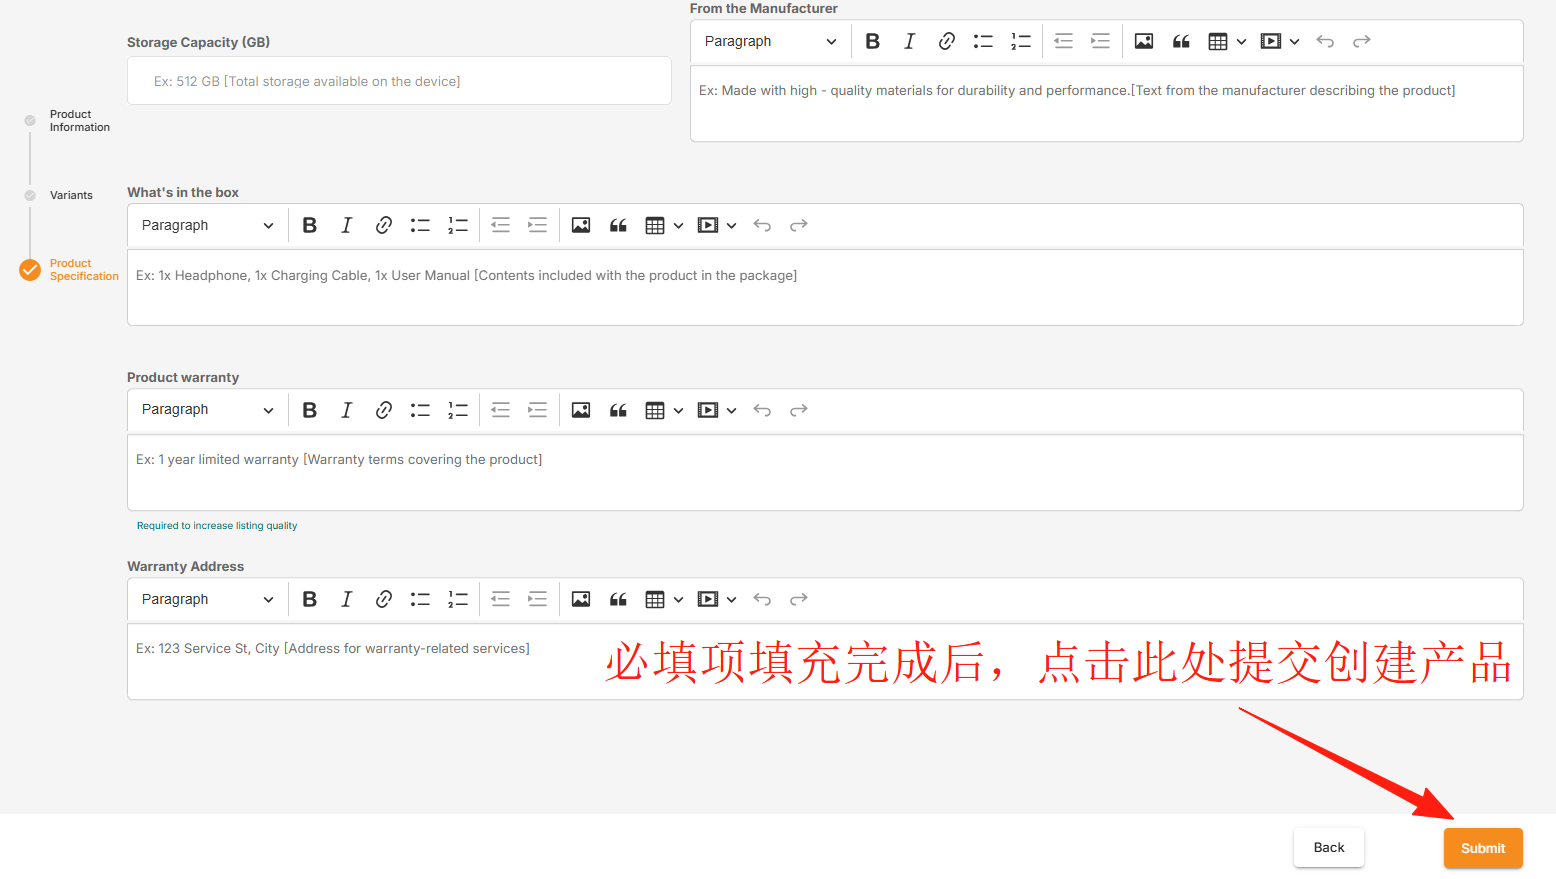
3. Once you have finished filling out the form, simply click the “Submit” button at the bottom.
Step 4: Submit
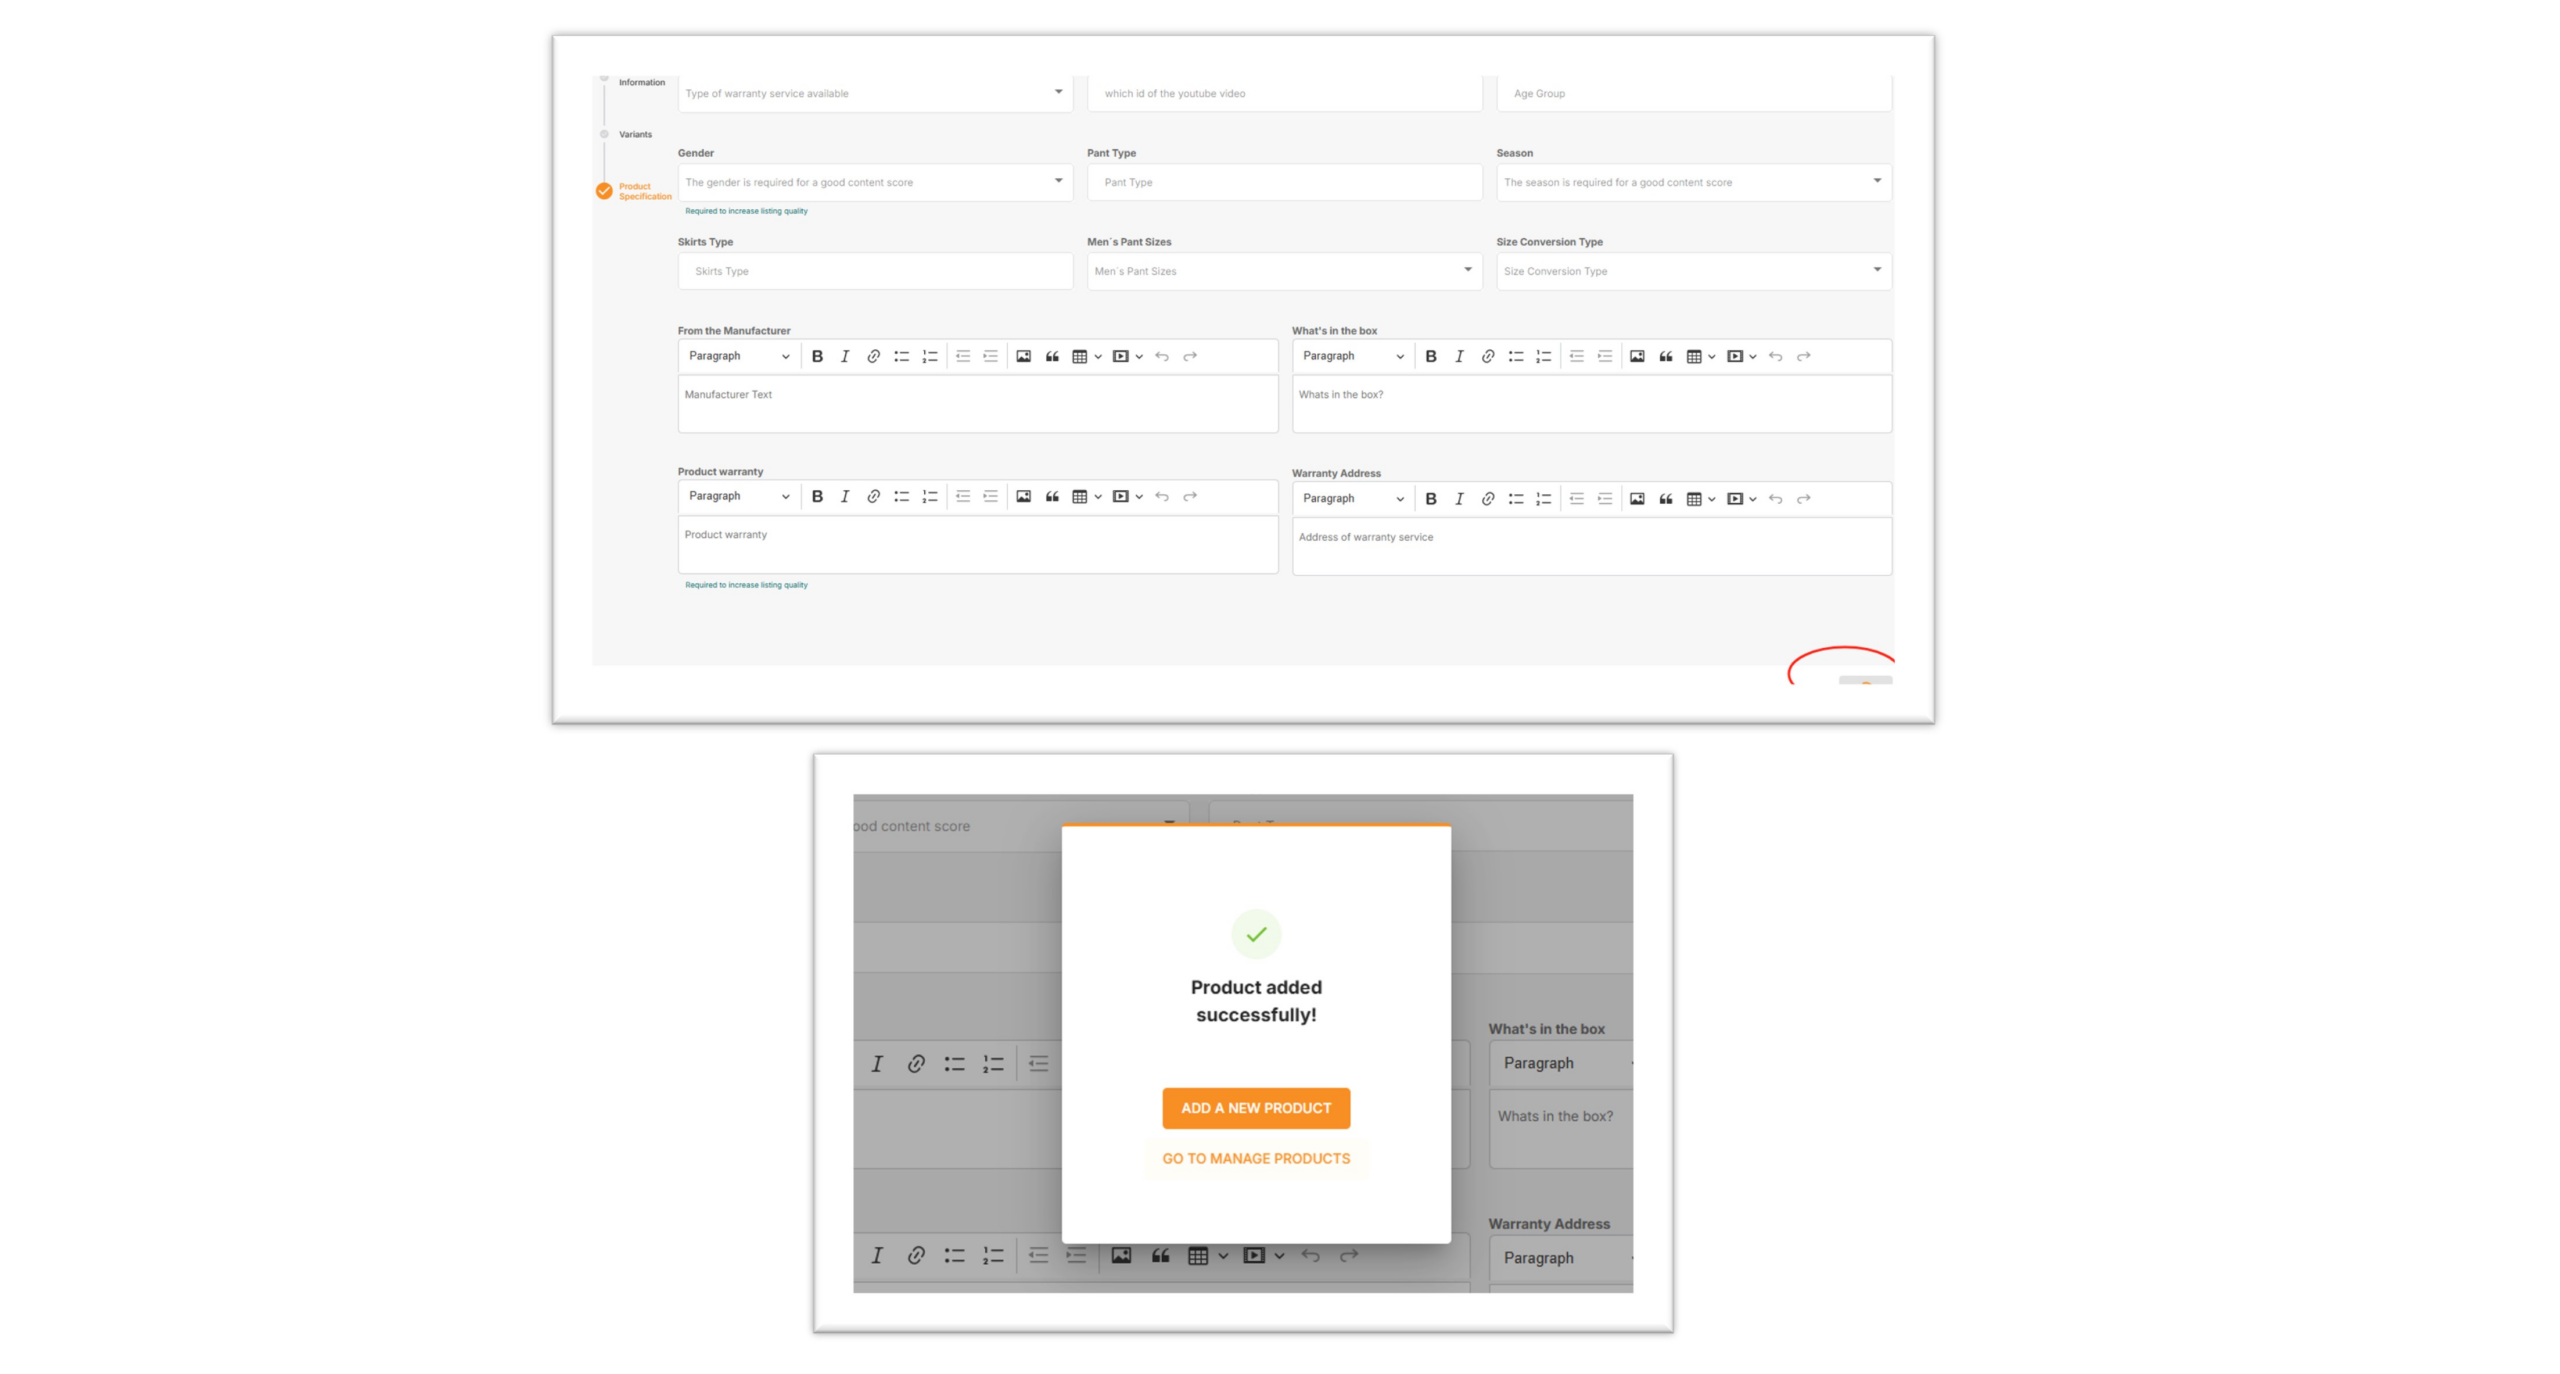
Click “Submit” to create the product.
Upon successful creation, a “Product added successfully!” message will appear.
- You can click “ADD A NEW PRODUCT” to add a new product,
- You can click “Go TO MANAGE PRODUCTS” to manage products.
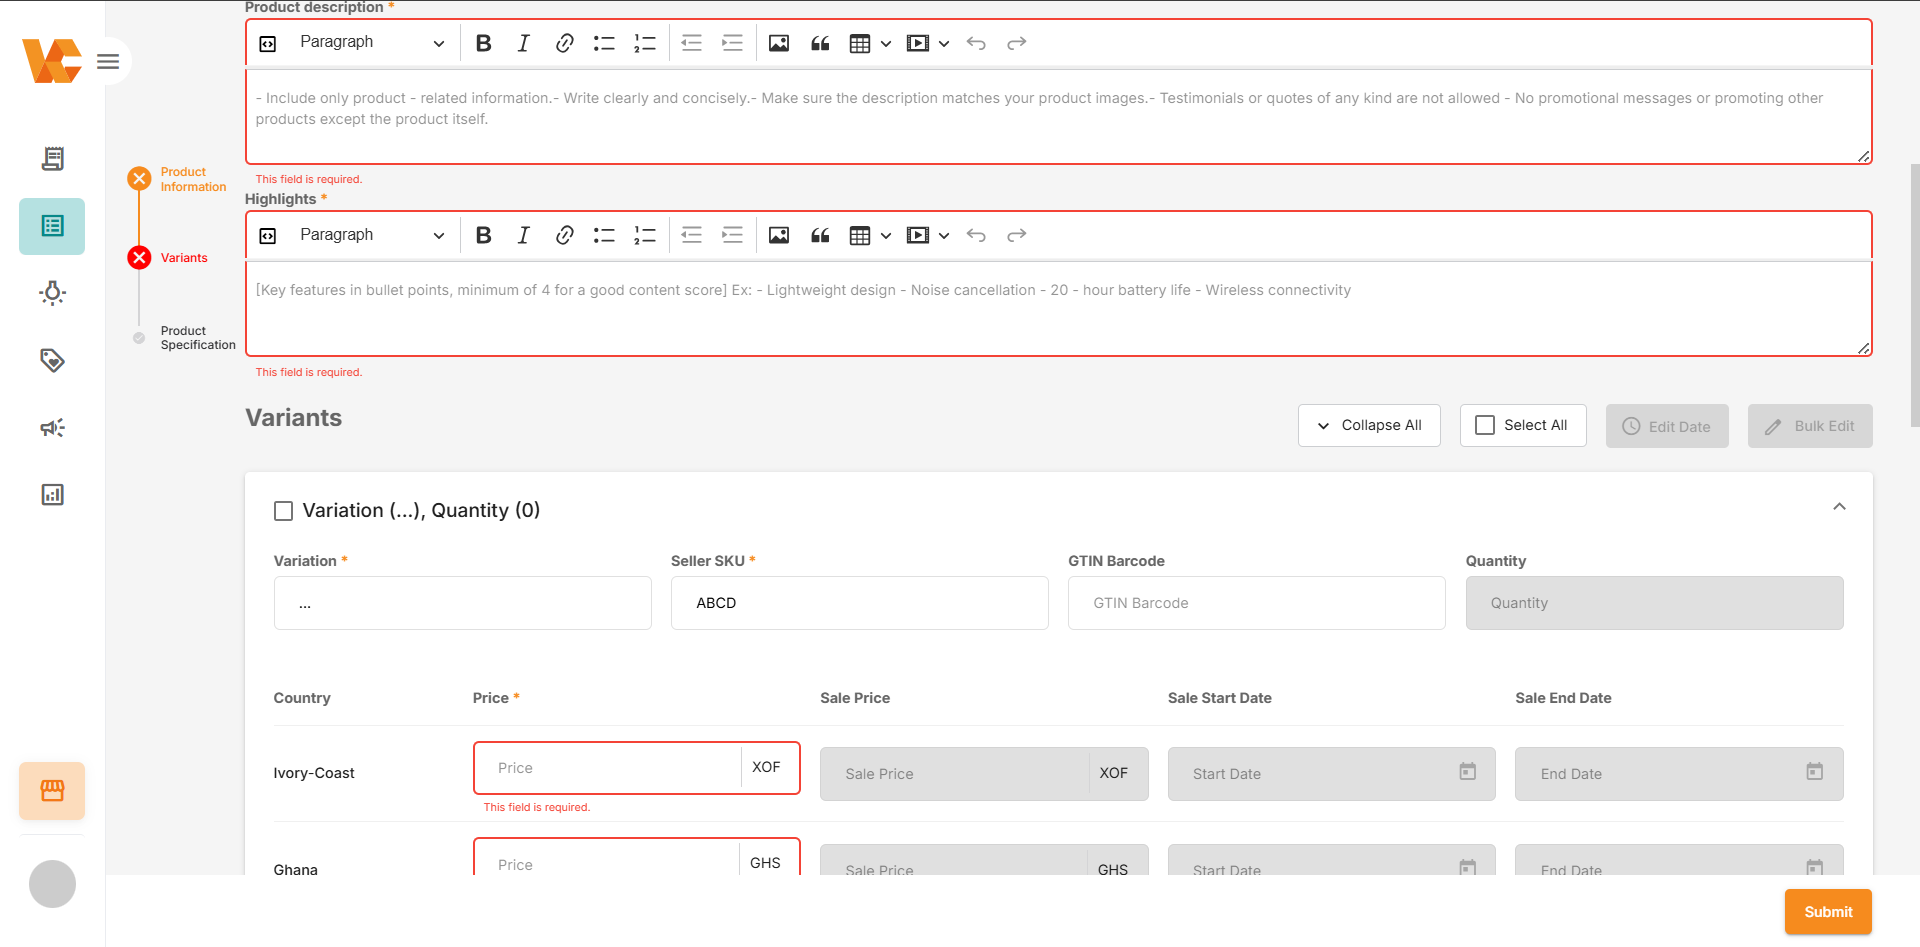
If creation fails, the system highlights the relevant input fields in red and displays a note below each field explaining the reason for the issue. Reasons for failure include:
- Input does not meet requirements
- Duplicate Seller SKU
- Missing mandatory information
- Other reasons
In this case, simply revise the information according to the system’s requirements and resubmit.
Once the product is successfully created, it will enter the product review process.
Click here to view the details.
